
Tamiya
Visiting Tamiya Headquarters!
07 - September - 2015 - 17:45
Earlier this year, I spent two weeks visiting Japan. As part of that trip, my wife and I visited her brother, who was studying in Shizuoka, a medium sized city about an hour and a half bullet train ride south-west of Tokyo. When looking into what to do for the couple of days that we would be in Shizuoka, I discovered that it was home to the headquarters of the Tamiya corporation! After a little research, I discovered that a) At the headquarters, there was a museum that was open to the public. b) The headquarters was a 20 minute walk from where we were staying.
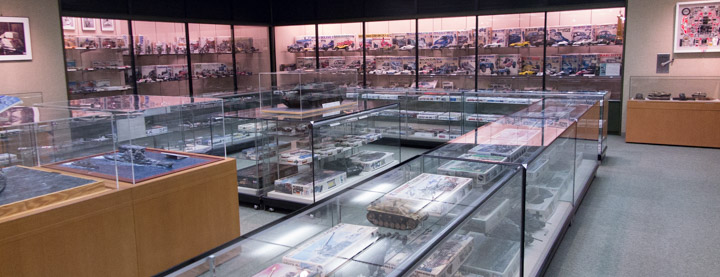
My wife and I walked across town and arrived there around 11am. We signed in at the front desk and were left to our own devices to wander about the first floor, which had a few galleries of models and full size cars. There is a showroom of their full size car collection, a room full of their current model releases and a room that is full of various models of historic significance to the company. There are also a few areas that have original box artwork on display and a few miscellaneous displays scattered about. After we wandered around for a few minutes, the receptionist called us over to a corner of the room that had some seating and a television. Through her broken English and out terrible Japanese, we determined that we should watch whatever she was about to show us. So, we sat and watched a 15 minute video about the Tamiya corporation and their model making process from start to finish, which was actually very interesting (and in English!). We were there on a weekday, and it was pretty much empty, so should you be in the neighborhood, I highly recommend stopping by!
What you see below are some of the photos I took there, along with some descriptions where relevant.
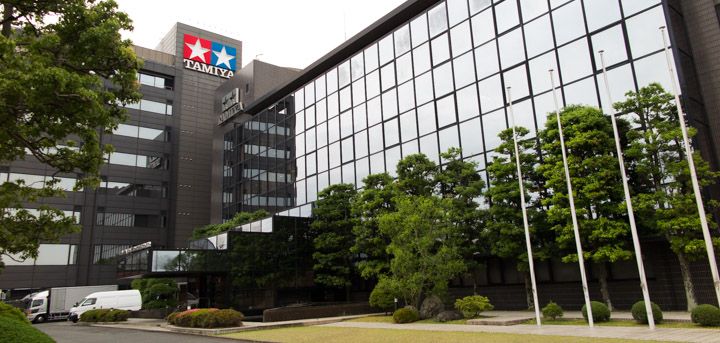
Here’s the view after passing through the main gates:
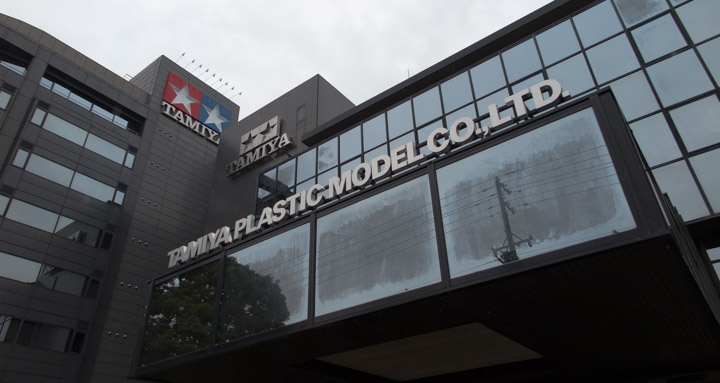
Right outside the front doors:
Over the years, Tamiya has purchased various vehicles as reference (or maybe just because they wanted to drive them around for fun). As a result they have a bit of a car collection, much of which is on display on the ground floor of their headquarters.
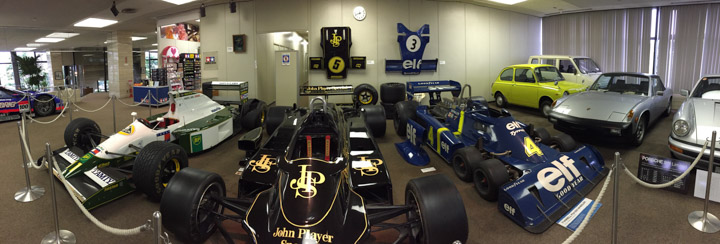
More of their car collection:
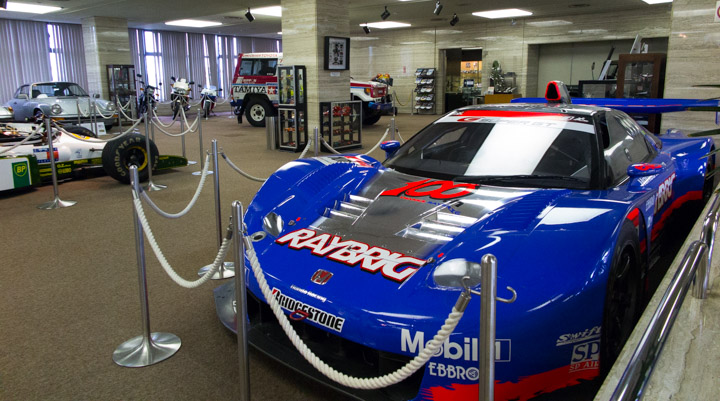
I’m sure this was totally for reference and definitely not driven around by the boss at any point ;)

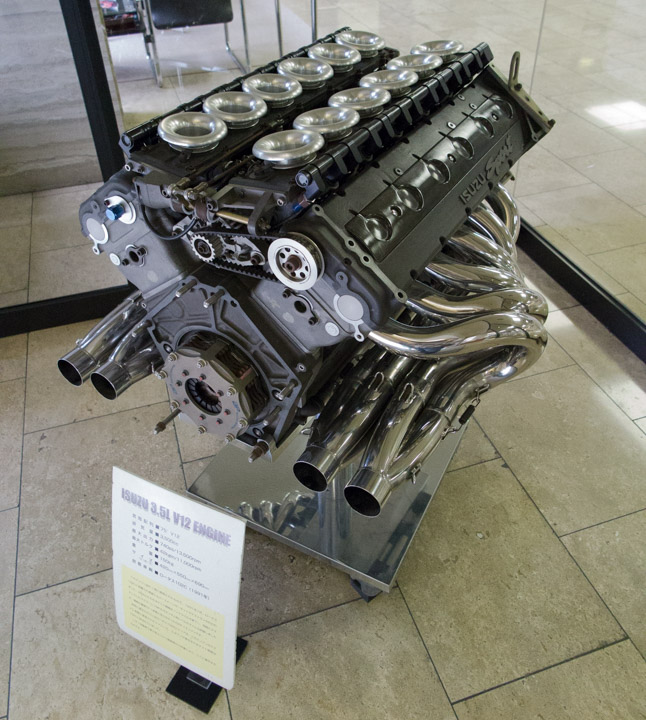
Who knew that Isuzu made a V12 engine? Definitely not me!
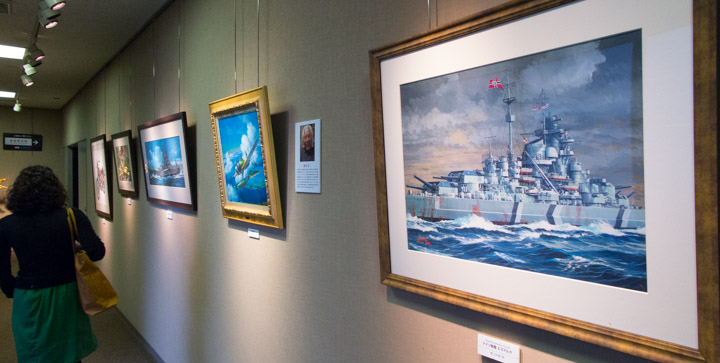
Some of the original paintings for box art:
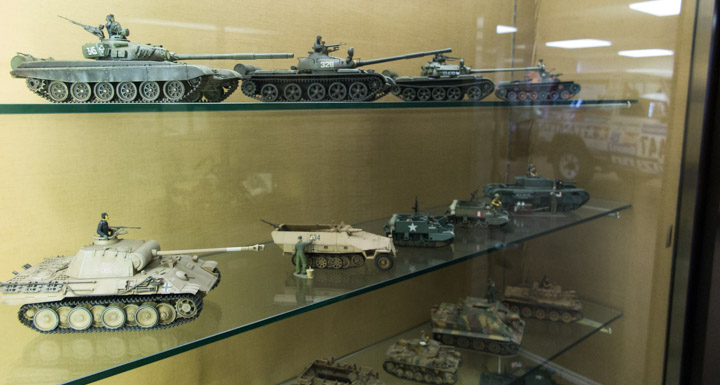
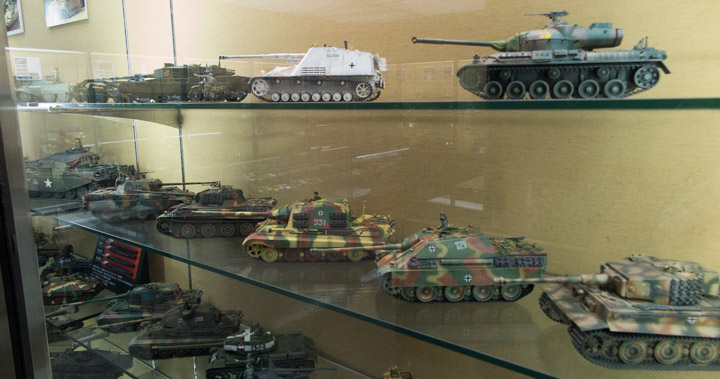
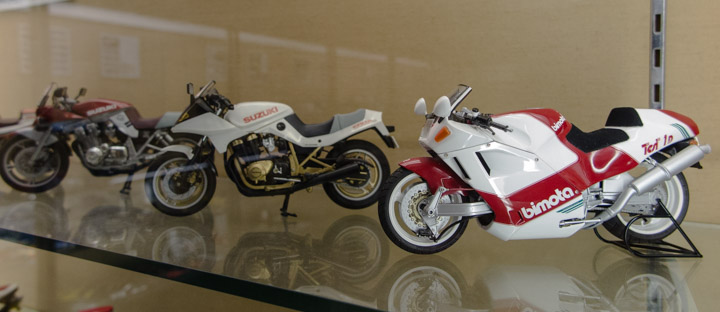
Here are a few photos from the gallery of current plastic models:
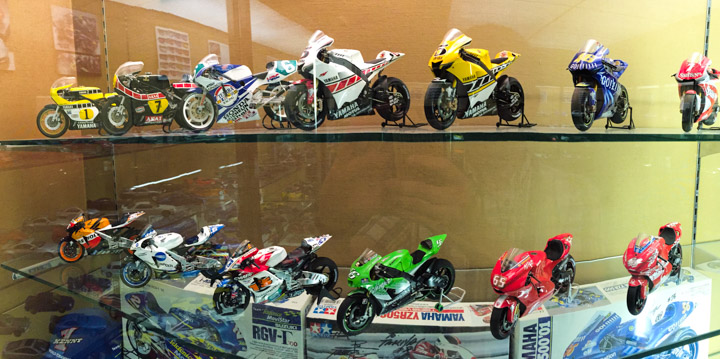
I built that Bimota model about 10 years ago!
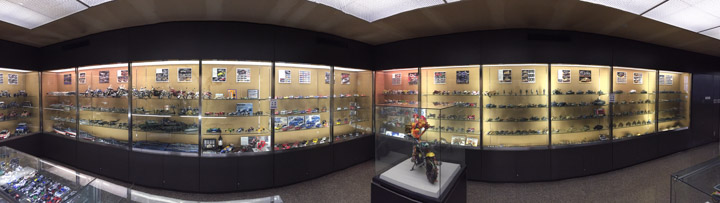
The whole Calsonic collection:
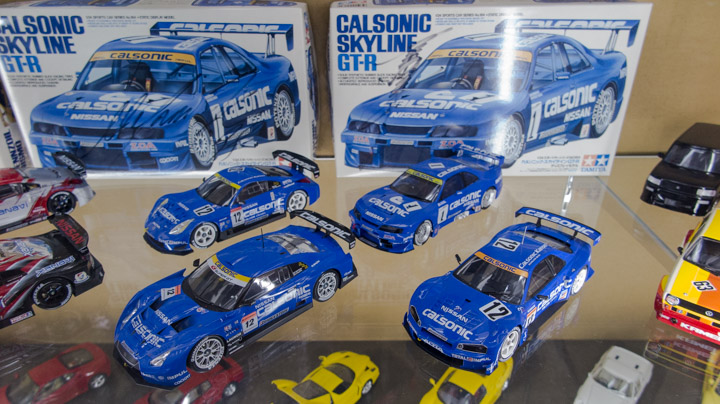
The wall cases in the background are all of their R/C releases.
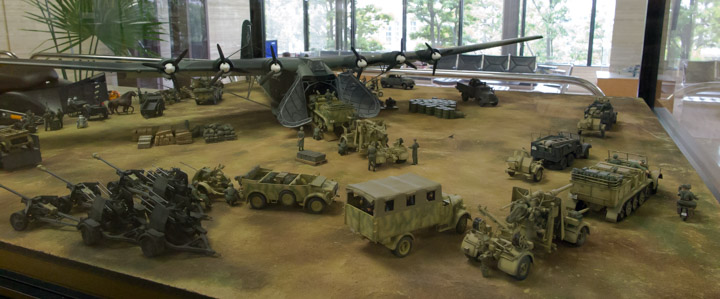
These were some models and dioramas that were on display out with the full size cars:
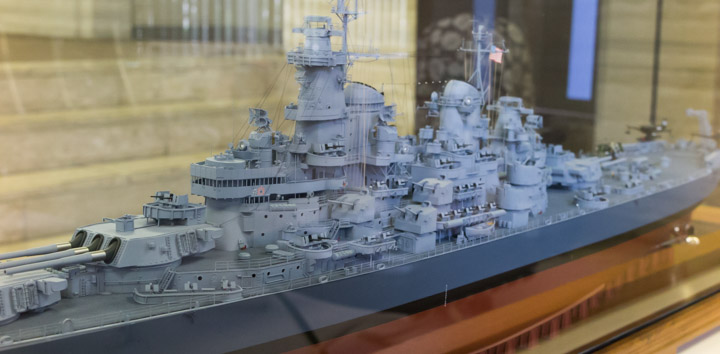
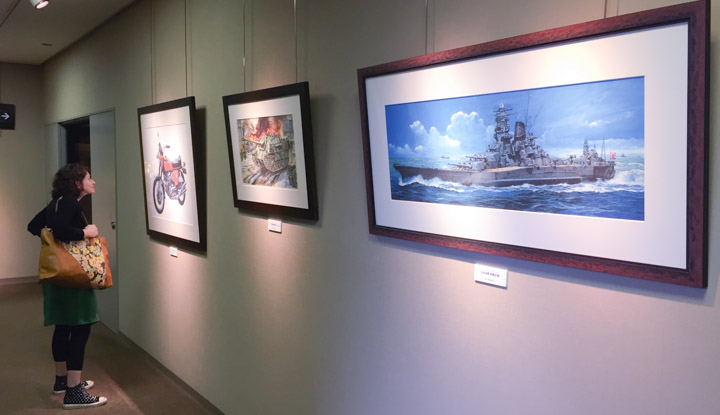
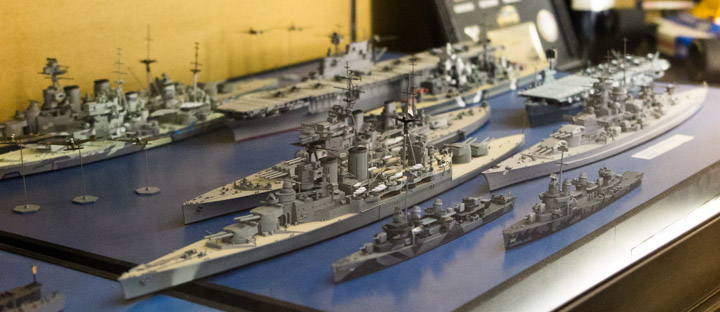
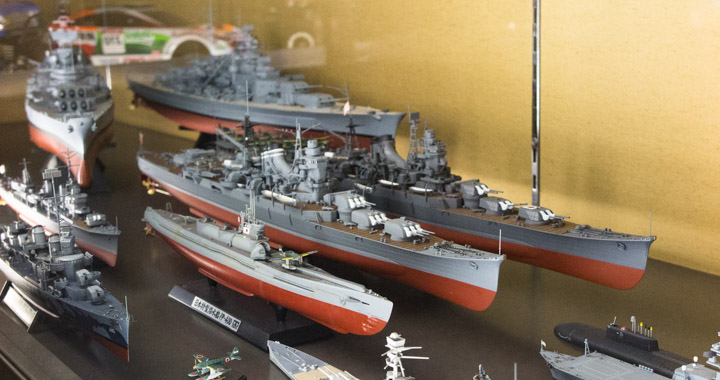
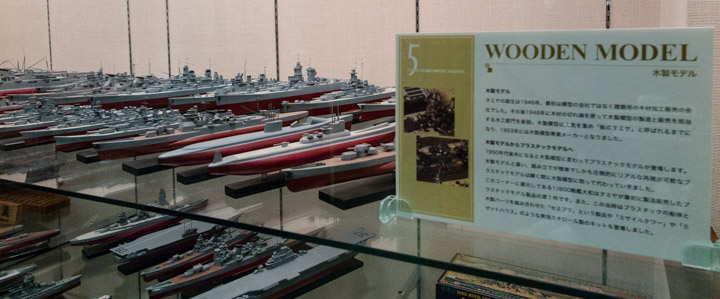
Here are a few from the gallery of models of historical significance (to the Tamiya company). The below ship appeared to be made entirely of paper!
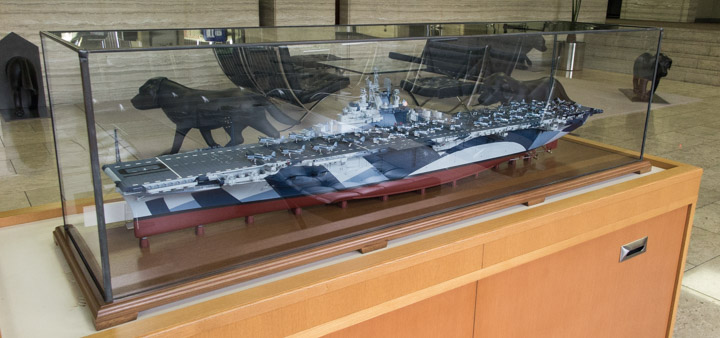
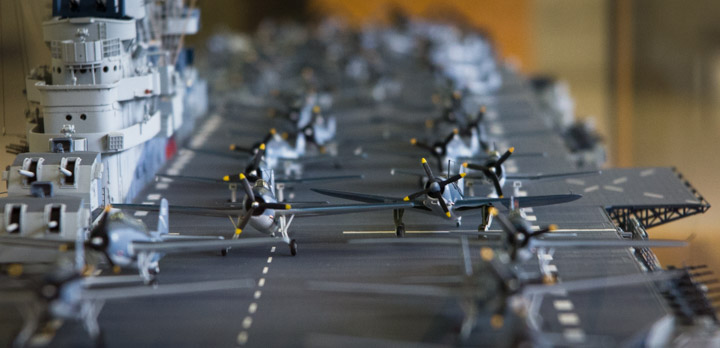
This ship had to be five or six feet long!
I guess the beginnings of Tamiya were in the wooden ship kit business:
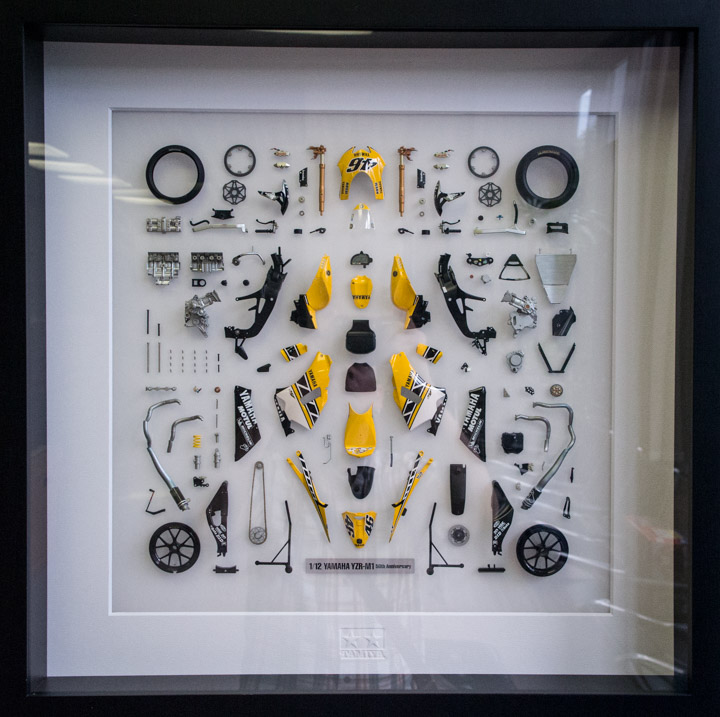
This was a pretty nice display of all the parts in a motorcycle kit, put together like this to celebrate the 50th anniversary of Tamiya:
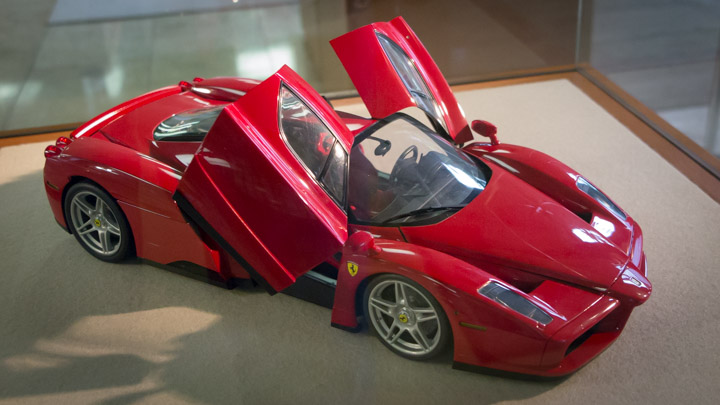
Finally, here’s a photo of the 1/12 scale Ferrari Enzo kit, assembled by their master builders. Hopefully mine will look half as good as theirs does when I’m done:
Thanks for reading, and let me know what you think in the comment section below!
My wife and I walked across town and arrived there around 11am. We signed in at the front desk and were left to our own devices to wander about the first floor, which had a few galleries of models and full size cars. There is a showroom of their full size car collection, a room full of their current model releases and a room that is full of various models of historic significance to the company. There are also a few areas that have original box artwork on display and a few miscellaneous displays scattered about. After we wandered around for a few minutes, the receptionist called us over to a corner of the room that had some seating and a television. Through her broken English and out terrible Japanese, we determined that we should watch whatever she was about to show us. So, we sat and watched a 15 minute video about the Tamiya corporation and their model making process from start to finish, which was actually very interesting (and in English!). We were there on a weekday, and it was pretty much empty, so should you be in the neighborhood, I highly recommend stopping by!
What you see below are some of the photos I took there, along with some descriptions where relevant.
Here’s the view after passing through the main gates:
Right outside the front doors:
Over the years, Tamiya has purchased various vehicles as reference (or maybe just because they wanted to drive them around for fun). As a result they have a bit of a car collection, much of which is on display on the ground floor of their headquarters.
More of their car collection:
I’m sure this was totally for reference and definitely not driven around by the boss at any point ;)
Who knew that Isuzu made a V12 engine? Definitely not me!
Some of the original paintings for box art:
Here are a few photos from the gallery of current plastic models:
I built that Bimota model about 10 years ago!
The whole Calsonic collection:
The wall cases in the background are all of their R/C releases.
These were some models and dioramas that were on display out with the full size cars:
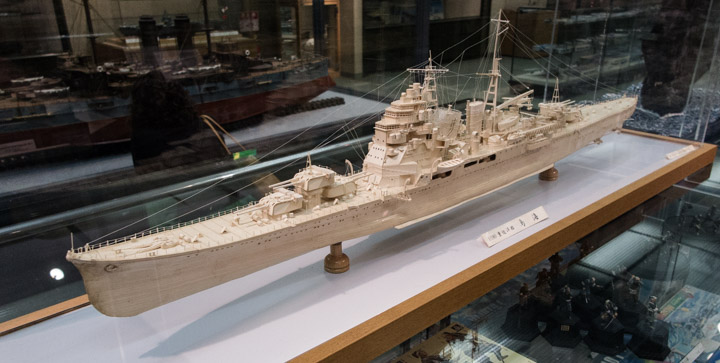
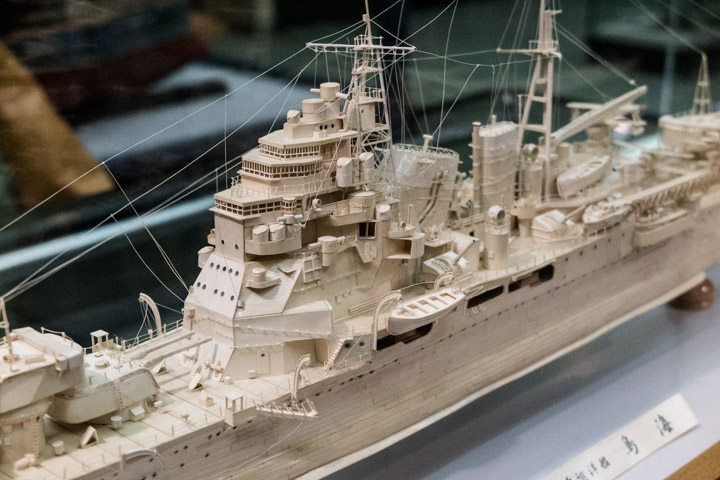
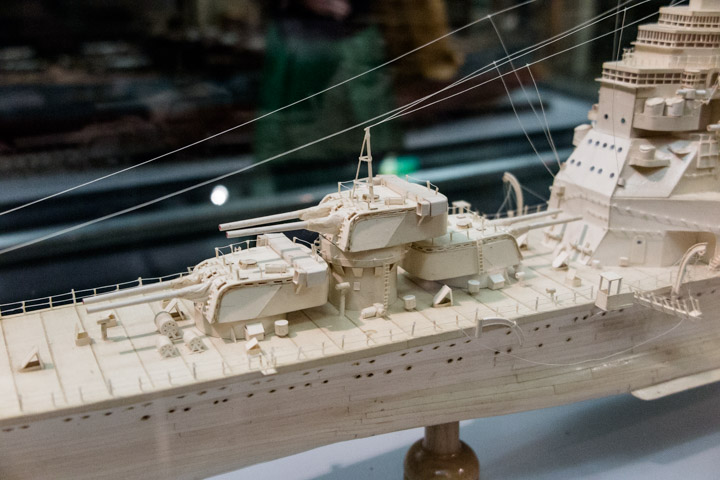
Here are a few from the gallery of models of historical significance (to the Tamiya company). The below ship appeared to be made entirely of paper!
This ship had to be five or six feet long!
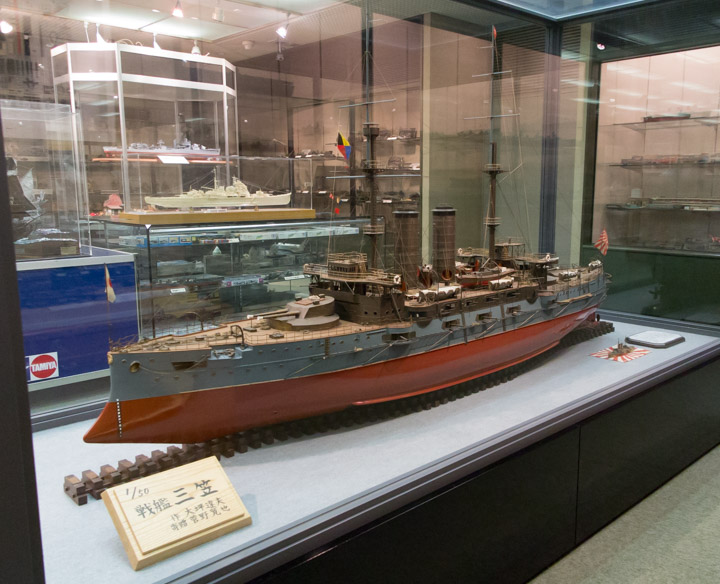
I guess the beginnings of Tamiya were in the wooden ship kit business:
This was a pretty nice display of all the parts in a motorcycle kit, put together like this to celebrate the 50th anniversary of Tamiya:
Finally, here’s a photo of the 1/12 scale Ferrari Enzo kit, assembled by their master builders. Hopefully mine will look half as good as theirs does when I’m done:
Thanks for reading, and let me know what you think in the comment section below!
Tamiya Ferrari Enzo
30 - August - 2015 - 18:22
After over a year of slacking on my blog, I’m back! Coinciding with a re-work of my web site and a move over from the blogspot location, I’m getting this blog moving again with a few new projects. I’ll touch on the second project in later posts, but for now, let’s have a look at…
The 1/12 Tamiya Ferrari Enzo!
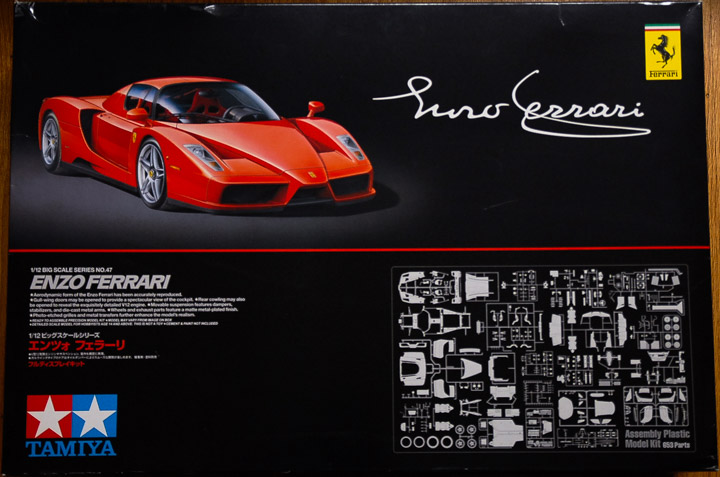
This kit is a monster, at 1/12 scale, with tons of detail and construction methods that mirror how the car is built at full scale. It’s got working, spring loaded doors, fully detailed engine and front trunk, working suspension and the molding is all top notch. Tamiya always does a great job with their kits and this one is no exception.
I also am calling upon some great resources from Scale Motorsport on this project. They offer a handy dvd full of reference photos of the Enzo, which allow me to pick through photos of the real thing and see which things the kit is missing and what details should be added.
But, as anyone who has followed a few of my projects knows, I’m never one to leave well enough alone. I couldn’t help but try to make this great kit even better. Scale Motorsport makes a few sets of extra parts for this kit that make it even more detailed.
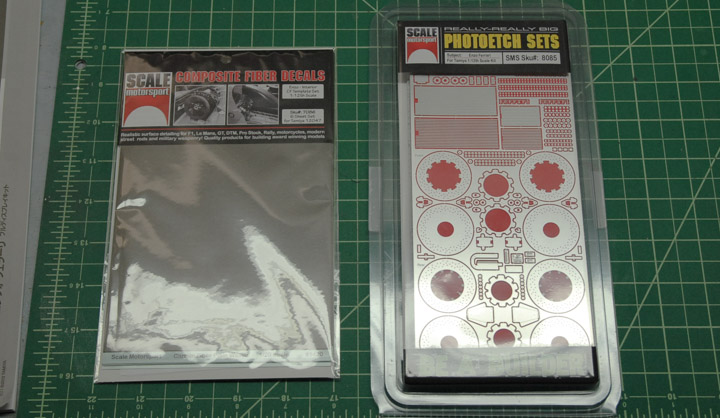
They offer a giant set of photo etch parts that add detail in some places, replace molded details in other places and generally make things look nicer. They also offer some great carbon fiber decal sets that are designed for this kit. I purchased the kit that covers the interior surfaces of the car that are unpainted carbon fiber on the real car.
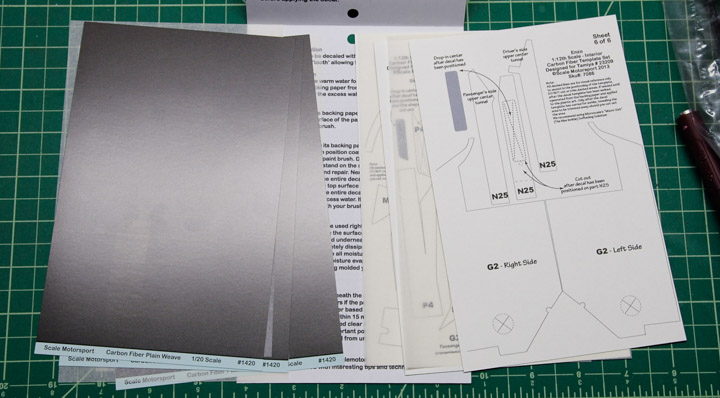
Below you can see the photo etch sheets, which are quite large.

Below you can see the sheets of composite decals. On the back of each sheet are the cut lines for each piece along with the part number that they are to go on to.
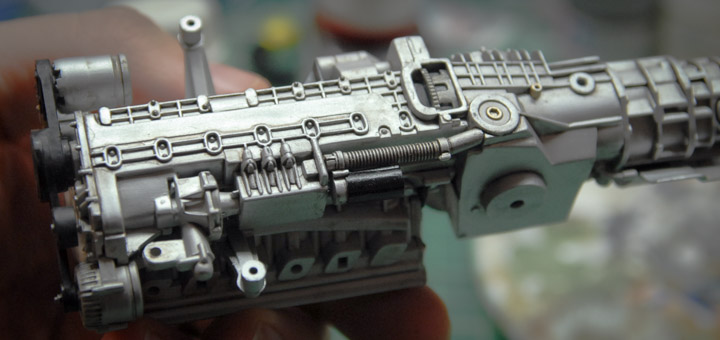
The first step in construction is the engine. At 1/12 scale, the engine is pretty huge. The big benefit here is that the parts are large, easy to work with and the detail well defined. This also presented the first opportunity to use some of the photo etch parts.
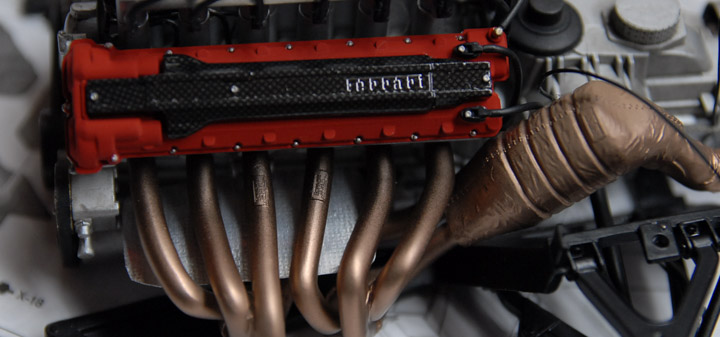
Below you can see the painted engine block with a quick dirt wash on it to help pick out the details.
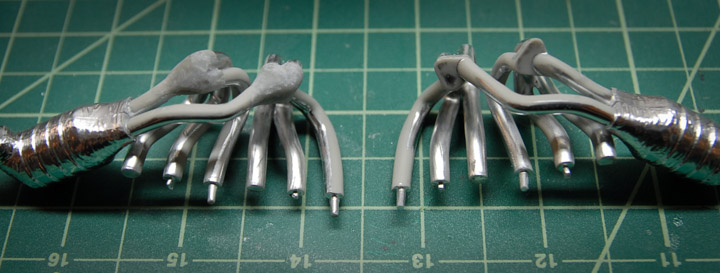
In picking through the reference photos, I noticed that the headers didn’t end in a flat plate like the plastic parts do, but had smooth 3-to-1 collectors. I decided that this was something that I needed to change. Using some Milliput epoxy putty, I formed some transitions, let them harden and then ground them into final shape. Below you can see the headers with and without the putty in place.
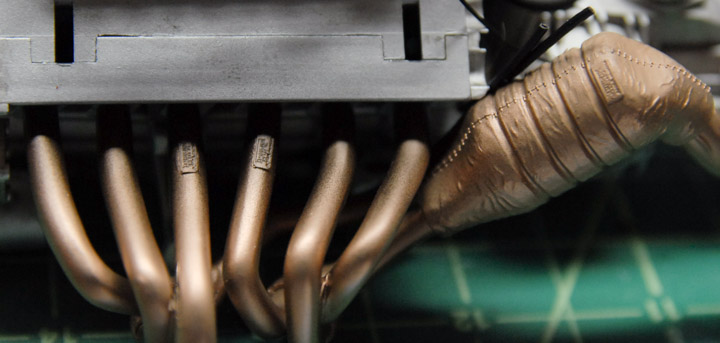
Part of the photo etch upgrade kit are these little plates that attach to the headers and catalytic converter.
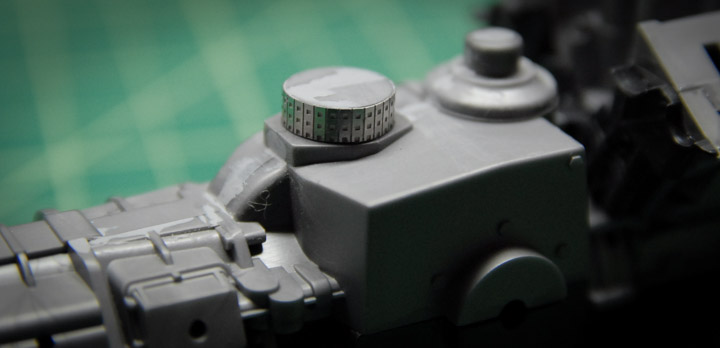
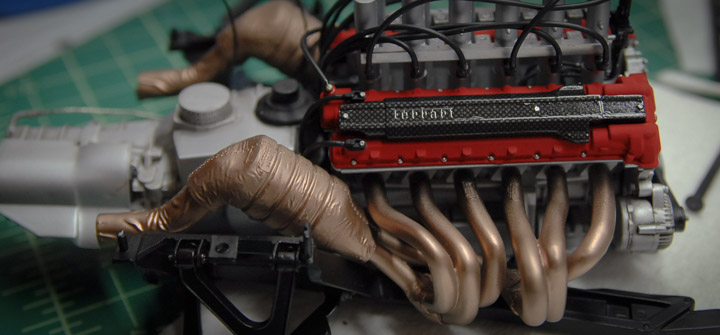
Below you can see the engine coming together and starting to look more engine-y. The valve cover piece was not part of the composite decal kit, but I order a few extra sheets of the decal so that I could add it in a few places. This one took quite a bit of fitting, cutting and adjusting to get it mostly conformed to the part. A healthy dose of decal softener and some clear coat got it looking pretty good.
I noticed in the reference photos that on the real car, there was a heat shield underneath the headers, presumably to help keep heat away from the oil pan (?). Whatever they are for, there was no corresponding part either in the kit or in the additional photo etch, so I made something out of some things I had in my extras drawer. I had some of the thin aluminum that was left over from the Curtiss Jenny model, cut out a piece of the appropriate size and then, because the real part has some pattern stamped into it, I used a little piece of screen (from a faucet) to hammer some pattern into my piece.
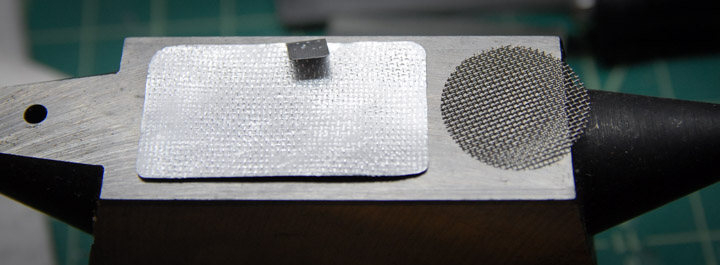
Below you can see the part installed.
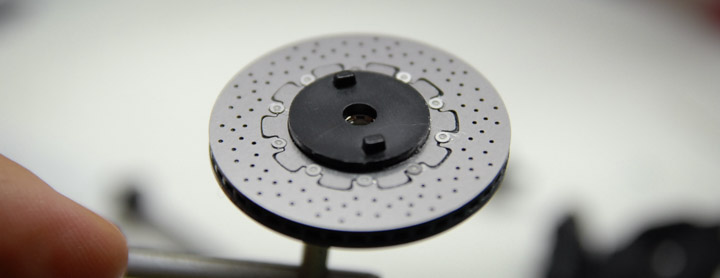
Next, construction moved to the drive train that is connected directly to the engine. This began with the brake assemblies. The photo etch kit had some replacement parts here. It had me sand the kit discs smooth and then put an outer disc, hub and bolts on in order to better represent the multi-piece rotors on the real car.
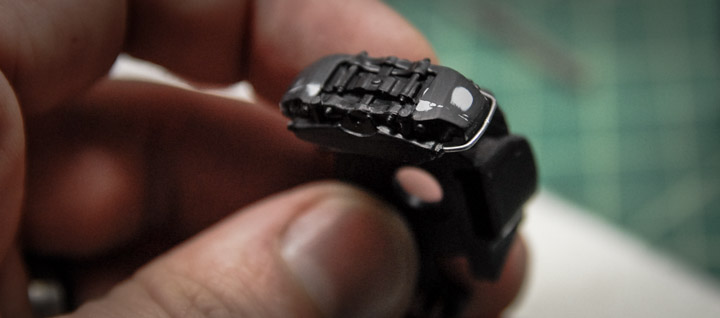
Looking at the reference, I thought that the brake calipers could be improved upon a bit, since the little tube that connects the two calipers was molded onto the plastic and wasn’t very convincing. I sanded that one off and replaced it with a bit of solder, in order to better mimic the real car.
As the hubs and rear suspension came together, I tried to add in some of the plumbing that wasn’t added by the kit. In some cases, the kit did supply some plastic tubing to be used for brake lines. Those that have put together a Tamiya kit before will be familiar with the hollow tubing that they generally supply. It usually looks very nice, but can be tricky to work with, since it is very light weight and a bit springy. This just makes it difficult to get the tubes to stay right where you want them to be. My trick with these tubes is to carefully run a bit of solder through the tube that is just small enough to fit through. The weight of the solder helps the tubes act a little more like the real things and the solder also allows me to bend and shape the tube as I see fit. Below you can see the solder sticking out of the end of the tubes before I added them to the model.
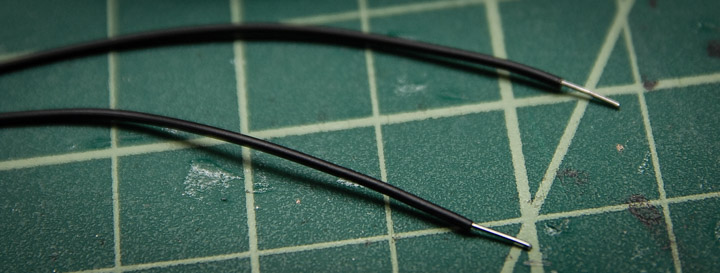
Below you can see the rear assembly and some of the tubes that have been added.
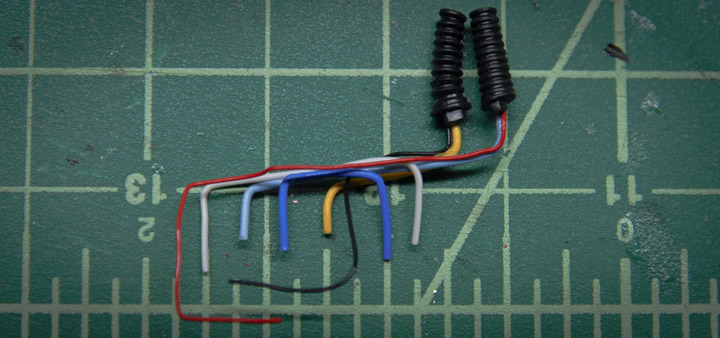
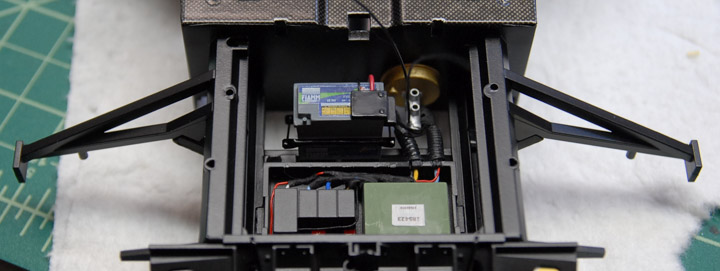
Next, assembly moved to the front trunk area. The kit includes the visible parts of the trunk, as well as the various electronics that go underneath the trunk. The trunk itself is removable, should you want to show off the details. After checking the reference, I decided I wanted some more wires under there, so I put together a simple wiring harness to tie into the various boxes. Below you can see the wires before they are installed.
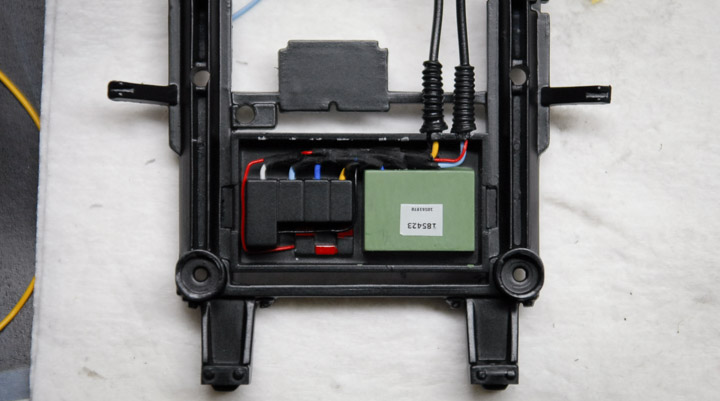
Here they are in place. I also used some black tissue paper, dampened with a white glue and water mixture, to simulate the cloth wrap that is used around the real wires.
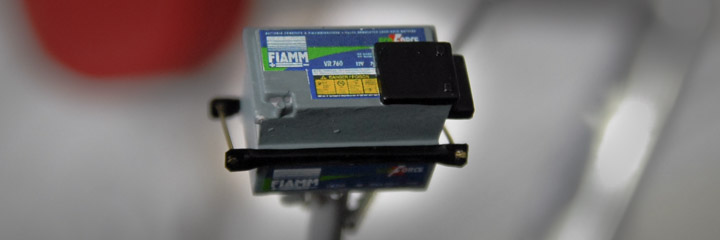
The battery didn’t have any decals with the kit, so I tracked down the brand that the car uses, and made a few decals of my own. I also fabricated an approximation of the little bracket that holds the battery in place.
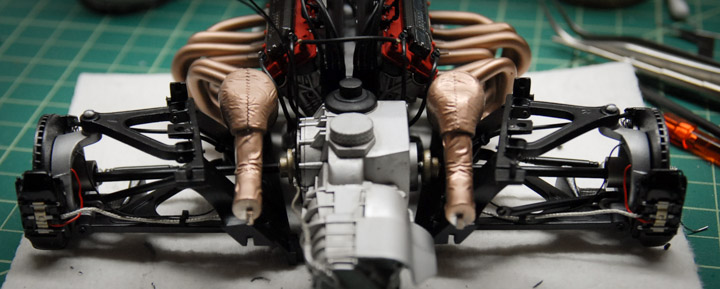
Here you can see everything in place in between where the front wheels will be.
That’s all for now. Construction has moved on a bit further, so look for another post soon, with the front suspension construction and some difficulties with the photo etch on the muffler. Thanks for reading!
The 1/12 Tamiya Ferrari Enzo!
This kit is a monster, at 1/12 scale, with tons of detail and construction methods that mirror how the car is built at full scale. It’s got working, spring loaded doors, fully detailed engine and front trunk, working suspension and the molding is all top notch. Tamiya always does a great job with their kits and this one is no exception.
I also am calling upon some great resources from Scale Motorsport on this project. They offer a handy dvd full of reference photos of the Enzo, which allow me to pick through photos of the real thing and see which things the kit is missing and what details should be added.
But, as anyone who has followed a few of my projects knows, I’m never one to leave well enough alone. I couldn’t help but try to make this great kit even better. Scale Motorsport makes a few sets of extra parts for this kit that make it even more detailed.
They offer a giant set of photo etch parts that add detail in some places, replace molded details in other places and generally make things look nicer. They also offer some great carbon fiber decal sets that are designed for this kit. I purchased the kit that covers the interior surfaces of the car that are unpainted carbon fiber on the real car.
Below you can see the photo etch sheets, which are quite large.
Below you can see the sheets of composite decals. On the back of each sheet are the cut lines for each piece along with the part number that they are to go on to.
The first step in construction is the engine. At 1/12 scale, the engine is pretty huge. The big benefit here is that the parts are large, easy to work with and the detail well defined. This also presented the first opportunity to use some of the photo etch parts.
Below you can see the painted engine block with a quick dirt wash on it to help pick out the details.
In picking through the reference photos, I noticed that the headers didn’t end in a flat plate like the plastic parts do, but had smooth 3-to-1 collectors. I decided that this was something that I needed to change. Using some Milliput epoxy putty, I formed some transitions, let them harden and then ground them into final shape. Below you can see the headers with and without the putty in place.
Part of the photo etch upgrade kit are these little plates that attach to the headers and catalytic converter.
Below you can see the engine coming together and starting to look more engine-y. The valve cover piece was not part of the composite decal kit, but I order a few extra sheets of the decal so that I could add it in a few places. This one took quite a bit of fitting, cutting and adjusting to get it mostly conformed to the part. A healthy dose of decal softener and some clear coat got it looking pretty good.
I noticed in the reference photos that on the real car, there was a heat shield underneath the headers, presumably to help keep heat away from the oil pan (?). Whatever they are for, there was no corresponding part either in the kit or in the additional photo etch, so I made something out of some things I had in my extras drawer. I had some of the thin aluminum that was left over from the Curtiss Jenny model, cut out a piece of the appropriate size and then, because the real part has some pattern stamped into it, I used a little piece of screen (from a faucet) to hammer some pattern into my piece.
Below you can see the part installed.
Next, construction moved to the drive train that is connected directly to the engine. This began with the brake assemblies. The photo etch kit had some replacement parts here. It had me sand the kit discs smooth and then put an outer disc, hub and bolts on in order to better represent the multi-piece rotors on the real car.
Looking at the reference, I thought that the brake calipers could be improved upon a bit, since the little tube that connects the two calipers was molded onto the plastic and wasn’t very convincing. I sanded that one off and replaced it with a bit of solder, in order to better mimic the real car.
As the hubs and rear suspension came together, I tried to add in some of the plumbing that wasn’t added by the kit. In some cases, the kit did supply some plastic tubing to be used for brake lines. Those that have put together a Tamiya kit before will be familiar with the hollow tubing that they generally supply. It usually looks very nice, but can be tricky to work with, since it is very light weight and a bit springy. This just makes it difficult to get the tubes to stay right where you want them to be. My trick with these tubes is to carefully run a bit of solder through the tube that is just small enough to fit through. The weight of the solder helps the tubes act a little more like the real things and the solder also allows me to bend and shape the tube as I see fit. Below you can see the solder sticking out of the end of the tubes before I added them to the model.
Below you can see the rear assembly and some of the tubes that have been added.
Next, assembly moved to the front trunk area. The kit includes the visible parts of the trunk, as well as the various electronics that go underneath the trunk. The trunk itself is removable, should you want to show off the details. After checking the reference, I decided I wanted some more wires under there, so I put together a simple wiring harness to tie into the various boxes. Below you can see the wires before they are installed.
Here they are in place. I also used some black tissue paper, dampened with a white glue and water mixture, to simulate the cloth wrap that is used around the real wires.
The battery didn’t have any decals with the kit, so I tracked down the brand that the car uses, and made a few decals of my own. I also fabricated an approximation of the little bracket that holds the battery in place.
Here you can see everything in place in between where the front wheels will be.
That’s all for now. Construction has moved on a bit further, so look for another post soon, with the front suspension construction and some difficulties with the photo etch on the muffler. Thanks for reading!
GT-R Complete & Photos
08 - August - 2010 - 10:07
I've wrapped up the build of the Tamiya GT-R kit. By the time I was finishing up this kit, I was remembering why is was that I tried a wooden kit in the first place. I get worn out on all the painting, the frustrations of various paint types not agreeing with one another, and the fragility of decals. Although at least with this project, I took away a few valuable lessons that I can keep in mind for future similar projects. Here are a few tidbits to remember:
- If it is going to be shiny, use lacquer. Tamiya's gloss acrylics just never behave when airbrushed.
- Don't use the microSOL (aka Decal Melter) until the decal is in it's final place and already partly dry.
- If some of it will be painted over, remove the underlying chrome plating first, otherwise, the paint will just chip off, despite using primer.
- Give the aforementioned lacquer PLENTY of time to dry before putting masking tape on it. Probably should wait 24 hours before trying.
- One should probably order a second set of decals for a project like this, as some are sure to be damaged. Alternately, perhaps one could scan them, and buy a self-print decal sheet so one could make replacements (although I'm not sure about the quality difference here)
- Third party racing harness kits, while pretty cool, might not be worth the effort unless the car is an open wheel type.
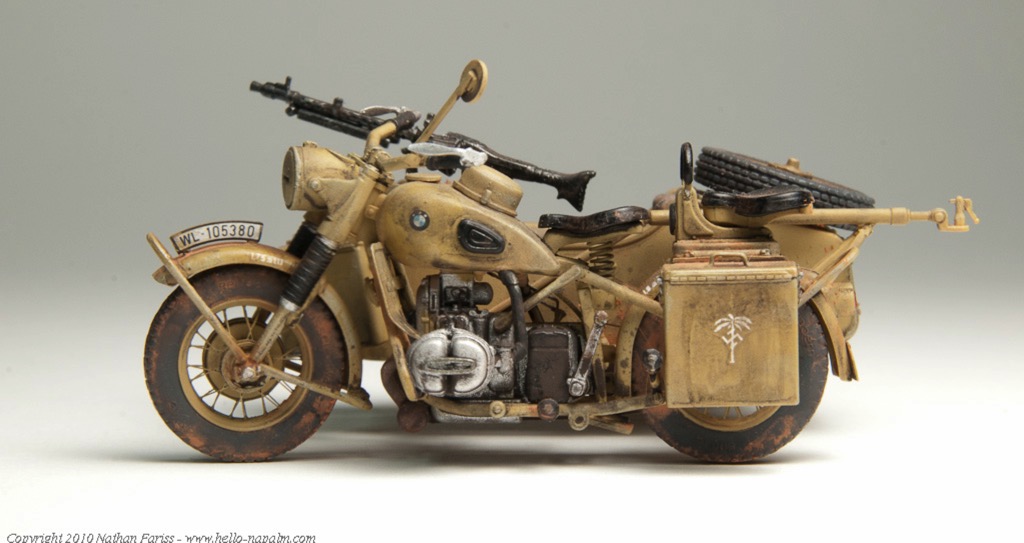
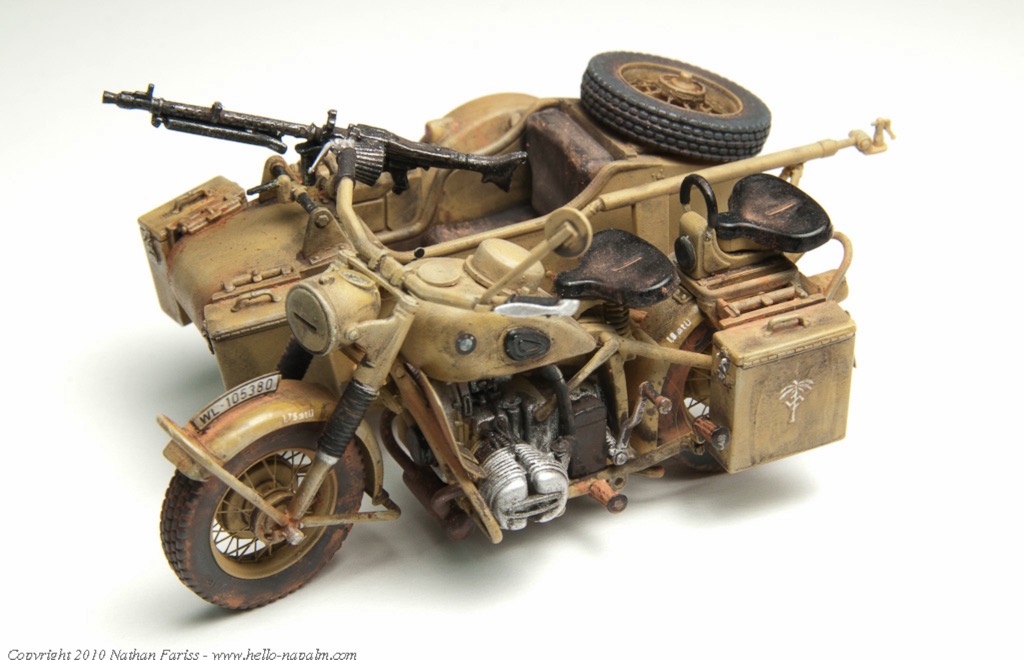
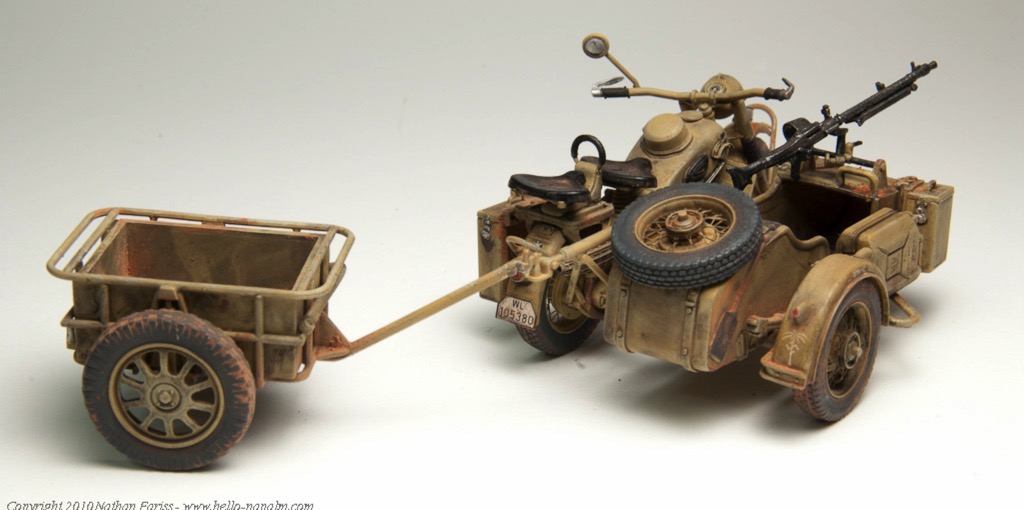
Anyhow, with this project completed, I spent a few minutes photographing but this car and the last project (WWII BMW r75 motorcycle). I recently purchased a new lens, which has some macro capabilities, and tried that out on this shoot. I am pretty pleased with the results. Here are a few images of the completed models:
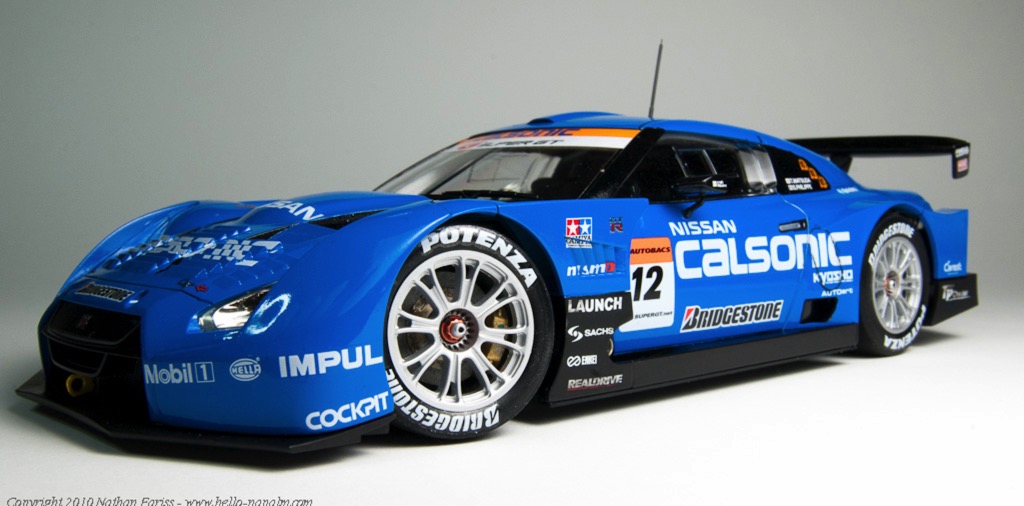
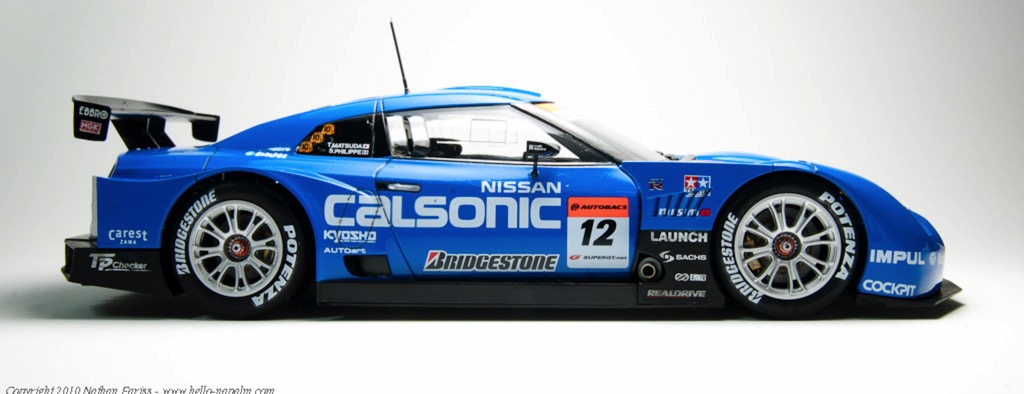
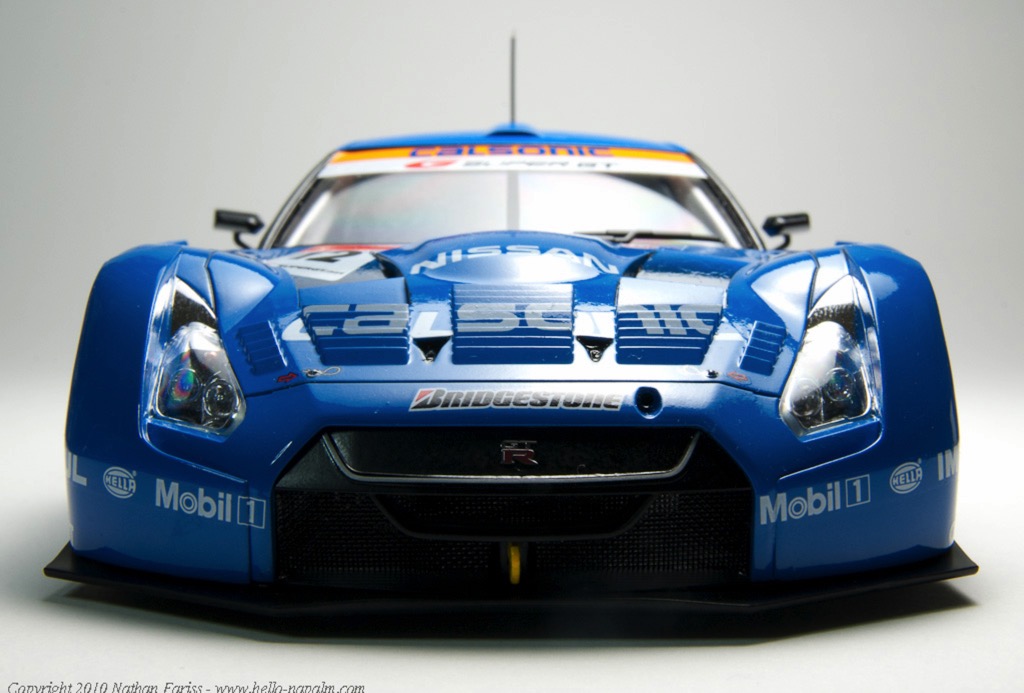
The full galleries are online and can be seen in the completed models section of this web site.
Next up: Model Airways' Curtis 'Jenny' wooden plane. Stay tuned for more model adventures!
- If it is going to be shiny, use lacquer. Tamiya's gloss acrylics just never behave when airbrushed.
- Don't use the microSOL (aka Decal Melter) until the decal is in it's final place and already partly dry.
- If some of it will be painted over, remove the underlying chrome plating first, otherwise, the paint will just chip off, despite using primer.
- Give the aforementioned lacquer PLENTY of time to dry before putting masking tape on it. Probably should wait 24 hours before trying.
- One should probably order a second set of decals for a project like this, as some are sure to be damaged. Alternately, perhaps one could scan them, and buy a self-print decal sheet so one could make replacements (although I'm not sure about the quality difference here)
- Third party racing harness kits, while pretty cool, might not be worth the effort unless the car is an open wheel type.
Anyhow, with this project completed, I spent a few minutes photographing but this car and the last project (WWII BMW r75 motorcycle). I recently purchased a new lens, which has some macro capabilities, and tried that out on this shoot. I am pretty pleased with the results. Here are a few images of the completed models:
The full galleries are online and can be seen in the completed models section of this web site.
Next up: Model Airways' Curtis 'Jenny' wooden plane. Stay tuned for more model adventures!
Model Desk Renovation & Tamiya GT-R
05 - July - 2010 - 17:18
Since the last post, I've done a few things to make my workspace a bit better.
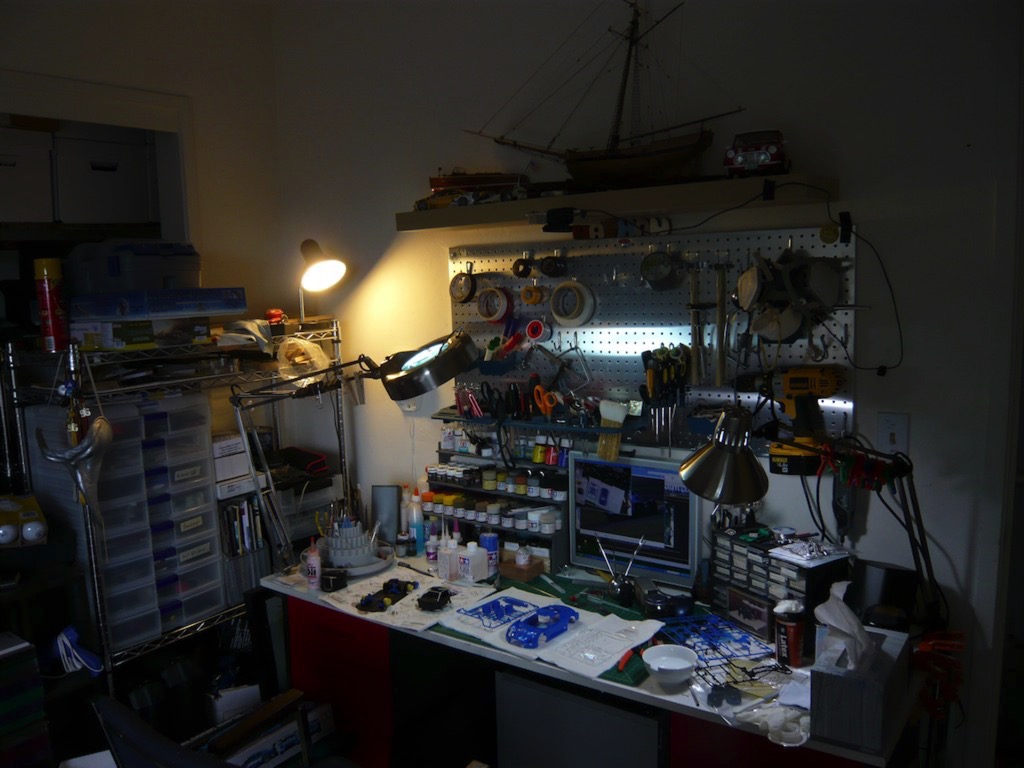
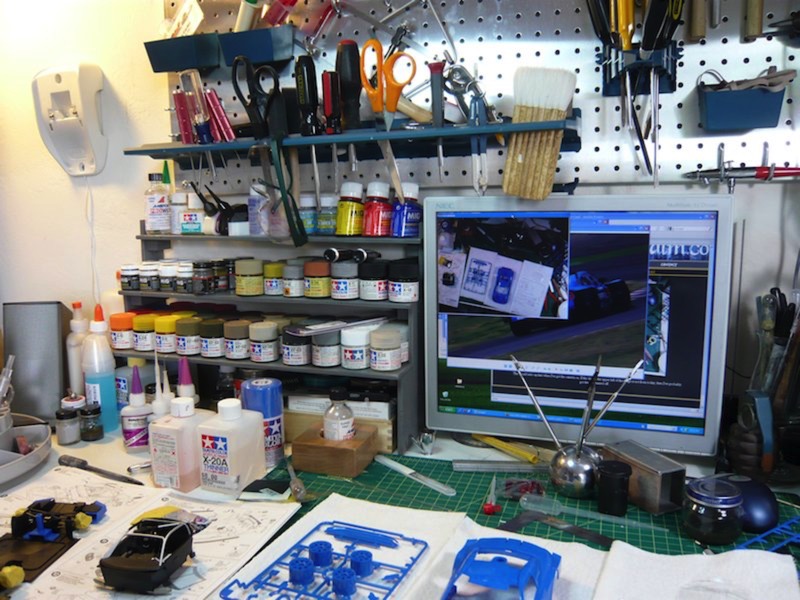
First I built myself a little shelf, so that I could have better access to my various paints, glues and other toxic chemicals. I just picked up a small sheet of thin plywood at Home Depot as well as some little 1"x1"x12" blocks of pine. I worked up some quick plans, drew them out onto the plywood, busted out the jigsaw and started cutting. After some gluing, drilling, a few wood screws, and a couple coats of gray spray paint, I now have a nice little shelf for my desk (you can also see here the monitor for the cam/computer setup I mentioned in the previous post):
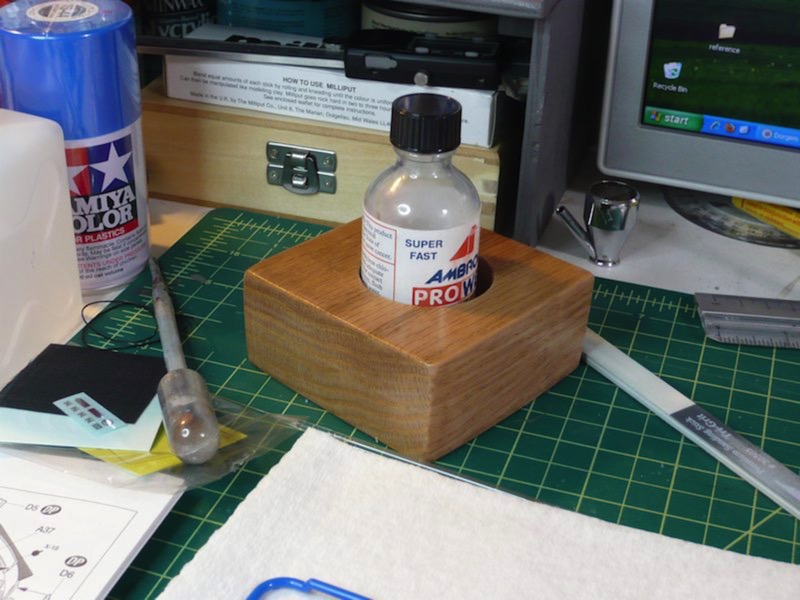
Next, after knocking over my bottle of high-power plastic cement, and melting all the lines off the middle of my cutting mat, I thought it might be a good idea to make sure that doesn't happen again. Especially since this was not the first time I had knocked this same bottle over. After rummaging around a bit, I found some nice wood I had left over from the base I made for the Panzer project (red oak, I think). I cut a couple squares of this, glued them together, and then, using a hole saw, drilled a hole just a bit bigger than the glue bottle. A couple coats of polyurethane, and now I've got a little block that keeps my glue bottle from falling over and doesn't look too terrible.
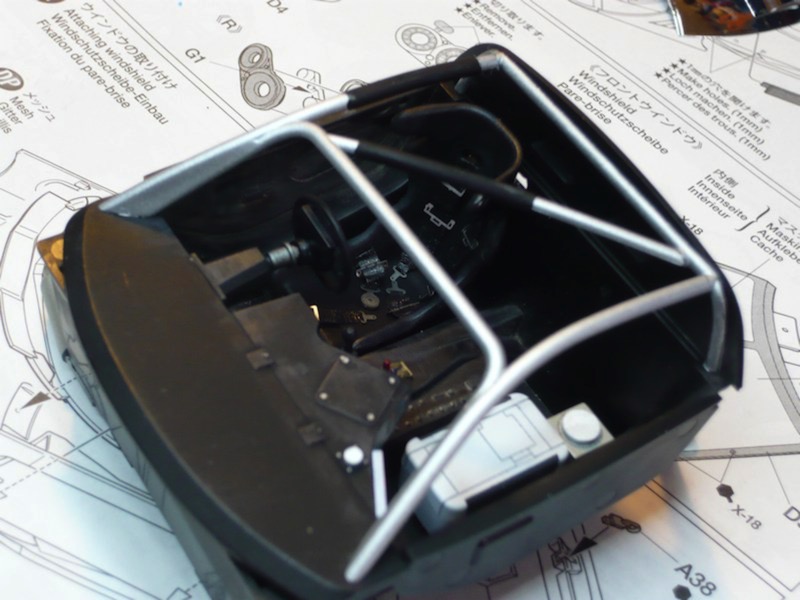
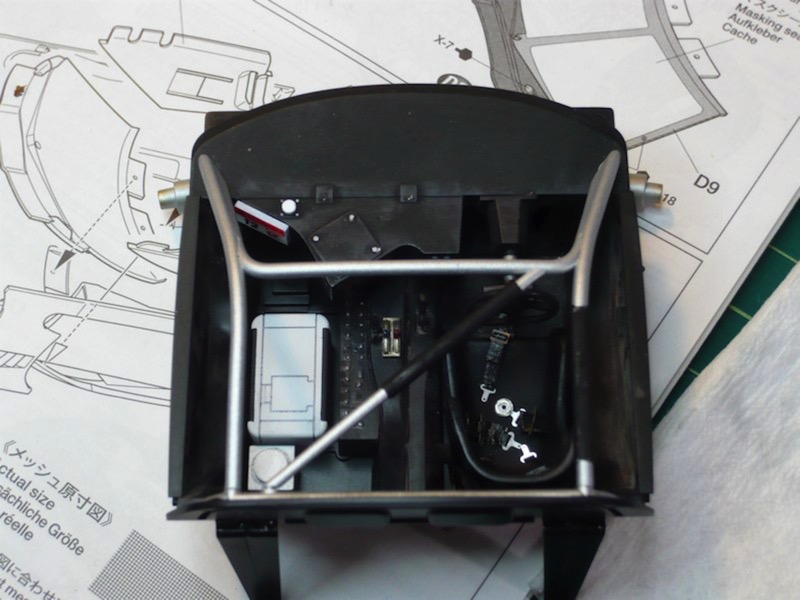
Before I jumped into another long-term wooden project, I decided to make one more plastic kit. I settled on the Tamiya Calsonic Impul GT-R kit that I bought a while back, thinking it would be fairly quick and easy, since it doesn't have an engine and only a rudimentary interior. I had intended to build it straight from the box, but I couldn't resist adding an third party racing harness kit. Here you can see the completed interior, as well as the mostly-built exterior shell:

I should wrap this project up in the next few weeks, and then I'll get some proper photographs of both this completed model and the motorcycle model that I finished before this one. Stay tuned!
First I built myself a little shelf, so that I could have better access to my various paints, glues and other toxic chemicals. I just picked up a small sheet of thin plywood at Home Depot as well as some little 1"x1"x12" blocks of pine. I worked up some quick plans, drew them out onto the plywood, busted out the jigsaw and started cutting. After some gluing, drilling, a few wood screws, and a couple coats of gray spray paint, I now have a nice little shelf for my desk (you can also see here the monitor for the cam/computer setup I mentioned in the previous post):
Next, after knocking over my bottle of high-power plastic cement, and melting all the lines off the middle of my cutting mat, I thought it might be a good idea to make sure that doesn't happen again. Especially since this was not the first time I had knocked this same bottle over. After rummaging around a bit, I found some nice wood I had left over from the base I made for the Panzer project (red oak, I think). I cut a couple squares of this, glued them together, and then, using a hole saw, drilled a hole just a bit bigger than the glue bottle. A couple coats of polyurethane, and now I've got a little block that keeps my glue bottle from falling over and doesn't look too terrible.
Before I jumped into another long-term wooden project, I decided to make one more plastic kit. I settled on the Tamiya Calsonic Impul GT-R kit that I bought a while back, thinking it would be fairly quick and easy, since it doesn't have an engine and only a rudimentary interior. I had intended to build it straight from the box, but I couldn't resist adding an third party racing harness kit. Here you can see the completed interior, as well as the mostly-built exterior shell:
I should wrap this project up in the next few weeks, and then I'll get some proper photographs of both this completed model and the motorcycle model that I finished before this one. Stay tuned!
A Sneak Preview
19 - June - 2010 - 08:22
Just a quick post to bring things up to date. Here's a quick look at upcoming projects.
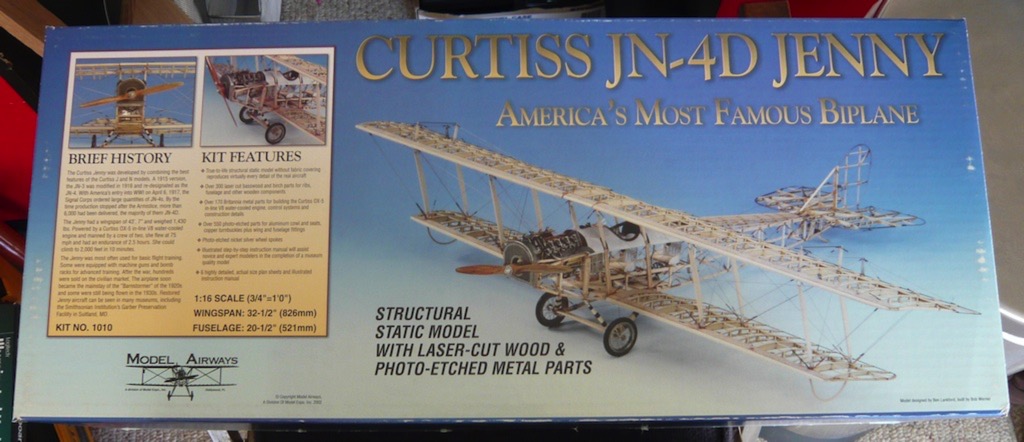
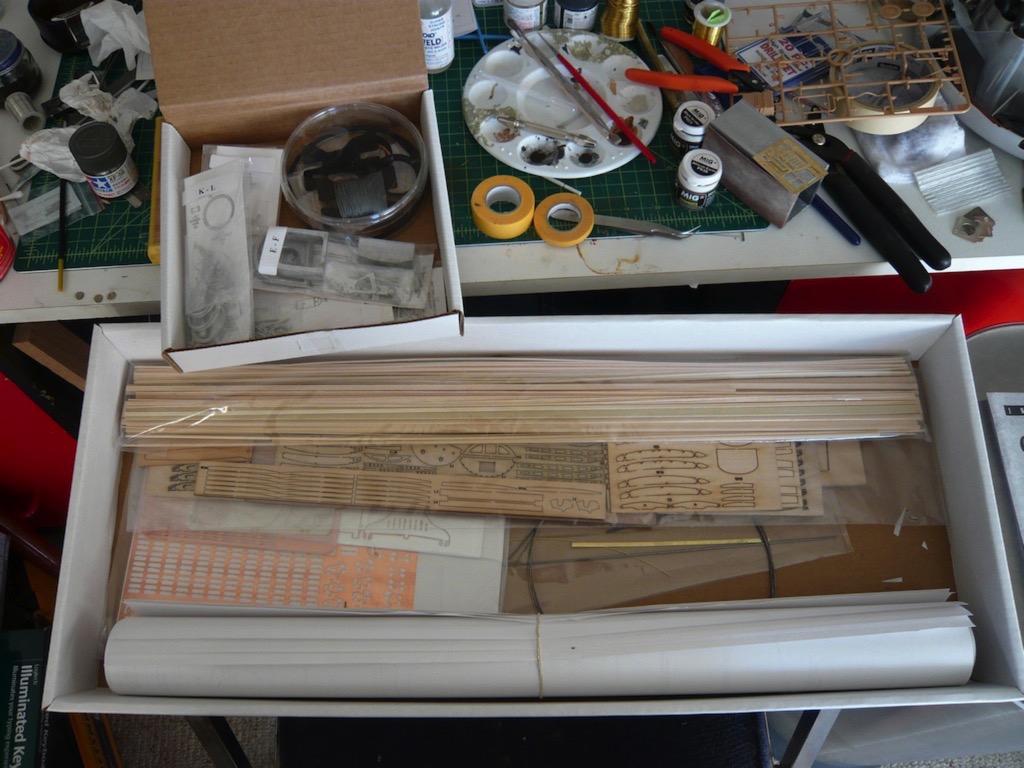
This past week I received a kit for another wooden and metal model. This one is a WWI biplane, the Curtiss JN-4D 'Jenny'. I'm hoping that it'll be a challenging build, similar to the Sloop build, except with much more metal and photo-etch. I'm actually hoping to set up a time-lapse recording method for this build, using an old computer, and a webcam. But since I think this might take me a little bit to get set up and tested, I'm going to hold off on starting this build for a little while.
So, in the meantime, after wrapping up the motorcycle model (which I plan on doing today), I'll be putting this one together:
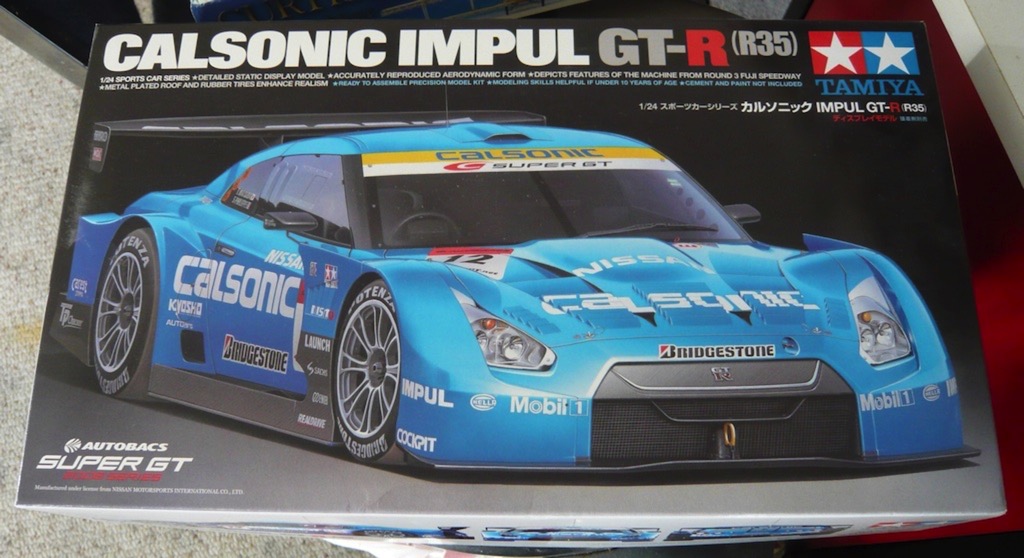
It should be a quick, fun build, since there isn't any engine. I was in the mood to make something shiny before I start on a longer build, so I figure I can crank through this one in a few weeks, and should be able to test out my time-lapse setup in the process :)
And there we have it. That's my modeling progress brought up to date. Party on.
This past week I received a kit for another wooden and metal model. This one is a WWI biplane, the Curtiss JN-4D 'Jenny'. I'm hoping that it'll be a challenging build, similar to the Sloop build, except with much more metal and photo-etch. I'm actually hoping to set up a time-lapse recording method for this build, using an old computer, and a webcam. But since I think this might take me a little bit to get set up and tested, I'm going to hold off on starting this build for a little while.
So, in the meantime, after wrapping up the motorcycle model (which I plan on doing today), I'll be putting this one together:
It should be a quick, fun build, since there isn't any engine. I was in the mood to make something shiny before I start on a longer build, so I figure I can crank through this one in a few weeks, and should be able to test out my time-lapse setup in the process :)
And there we have it. That's my modeling progress brought up to date. Party on.