
Letter Block Toy Box
29 - June - 2020 - 20:08
Some dear friends had themselves a baby a little while back so I wanted to build something for them that would hopefully last a lifetime. After searching around for some theme ideas, I stumbled across some toy block themed toy boxes that I thought would be fun. I wasn't crazy about the ones that I saw construction-wise (they looked a bit too flimsy), so I spent a bit of time mocking up a box in the computer and landed on a design that I thought would look nice, be sturdy enough to take lots of abuse and all while being safe for a toddler.
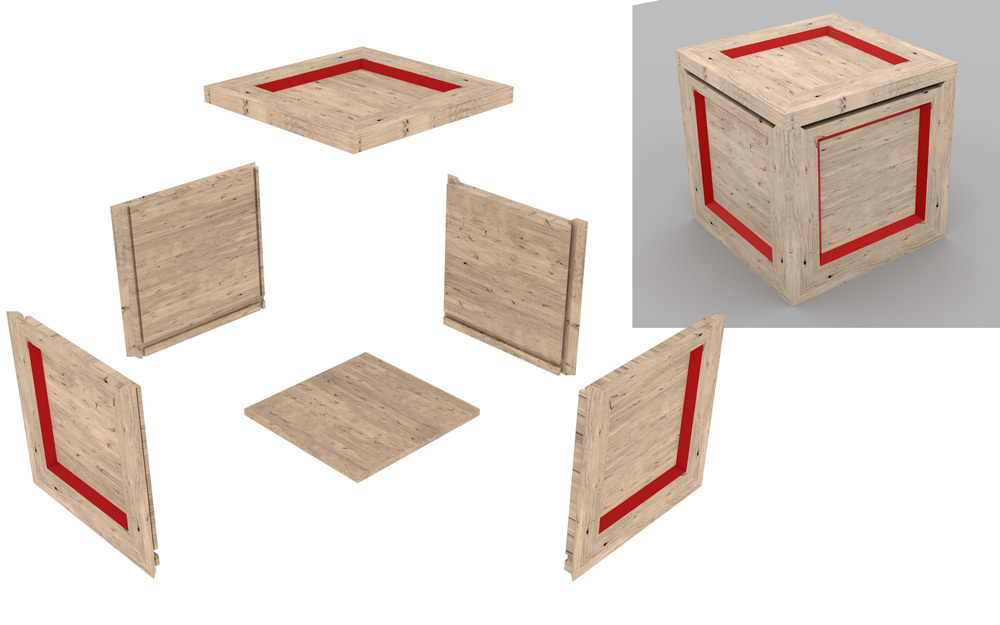
Below you can see the couple of images that I ended up with after my design process. I'll talk a bit about the special features as they come up in pictures later on, but the important thing to note is that it is big, heavy and made from solid ash. Did I mention that it is heavy?
This one is light on details and heavy on pictures, so enjoy the show!

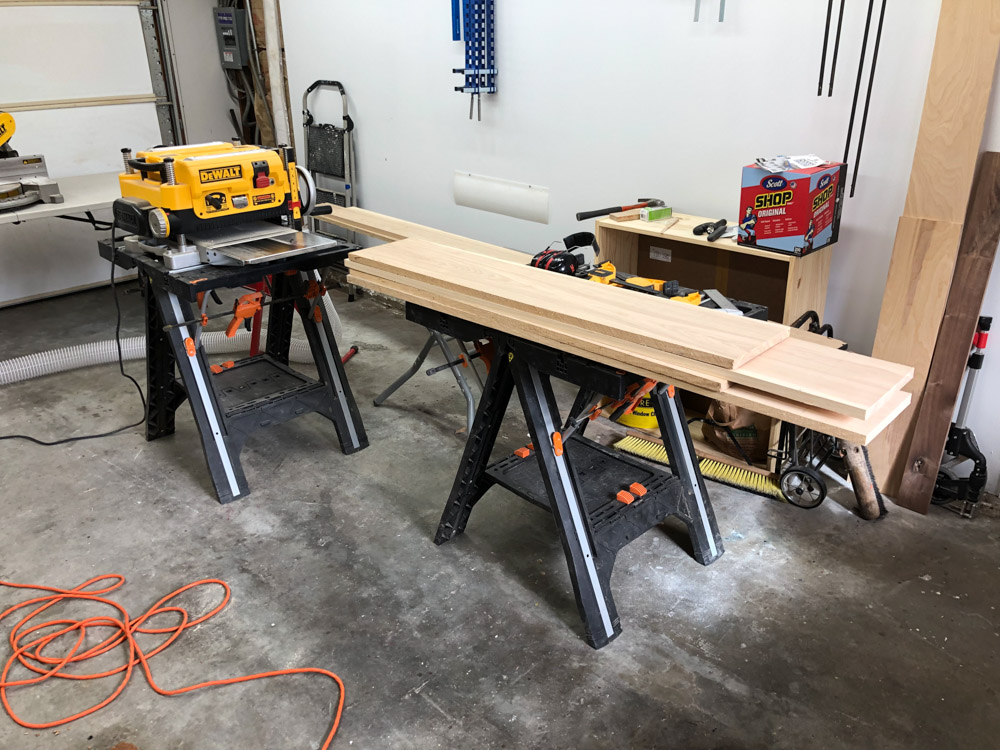
As usual, I started with a pile of wood from my local hardwood dealer, and milled it down to 3/4".
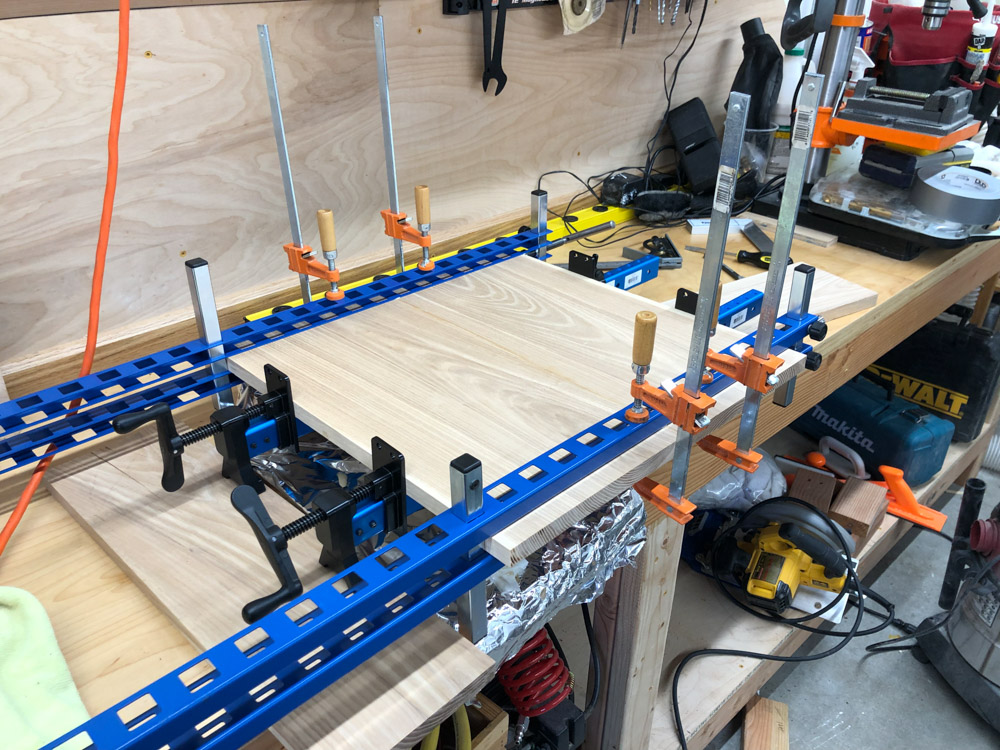
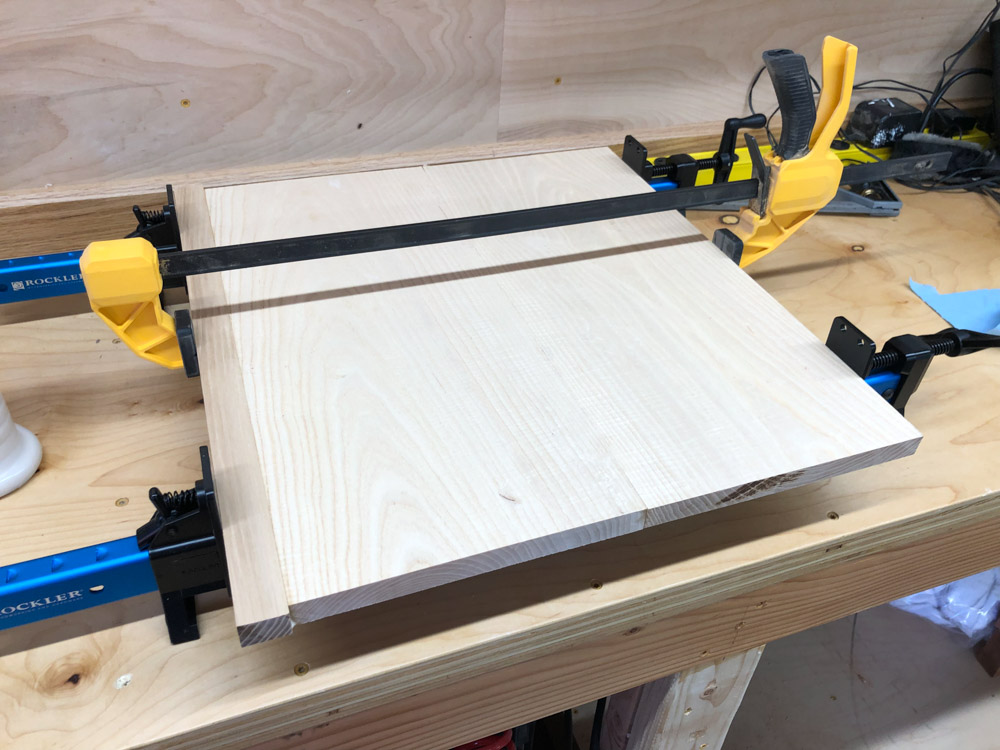
After cutting down to rough length, the main side panels were glued up. Below you can see the panel clamps from Rockler that I got for this project. I try to embrace Mike Pekovich's (creative director at Fine Woodworking magazine) theory that you should try to buy a new tool for each project, thereby slowly increasing your set of tools, but also trying out something new.
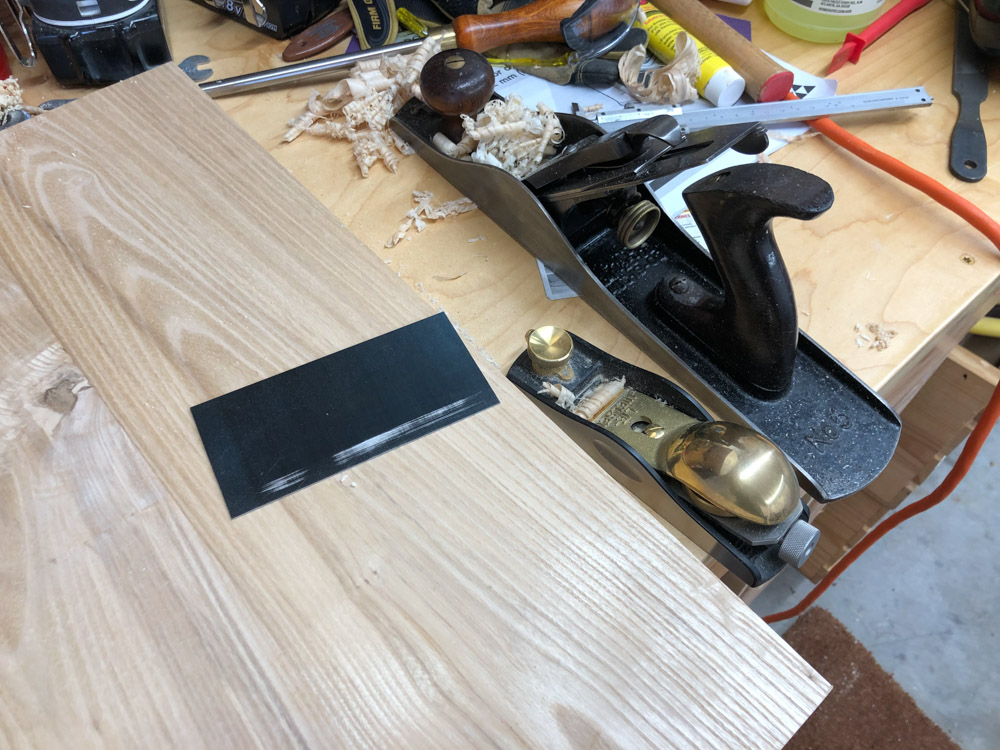
The panels took a bit of fine tuning, planing, scraping and such to get them smooth and clean.
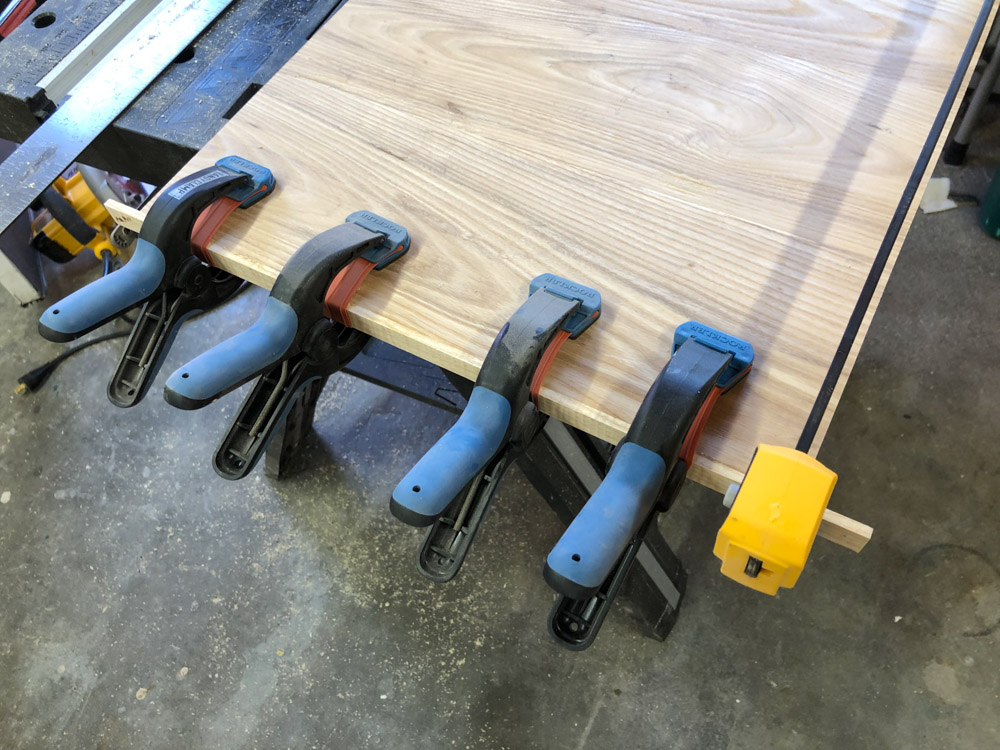
Turns out that the stock that I bought was an awkward width, being not quite wide enough to use two pieces to make one side. Fortunately, this extra bit should be hidden at the bottom of the inside.
And sometimes you accidentally make a panel just a liiiiiitle bit too narrow.
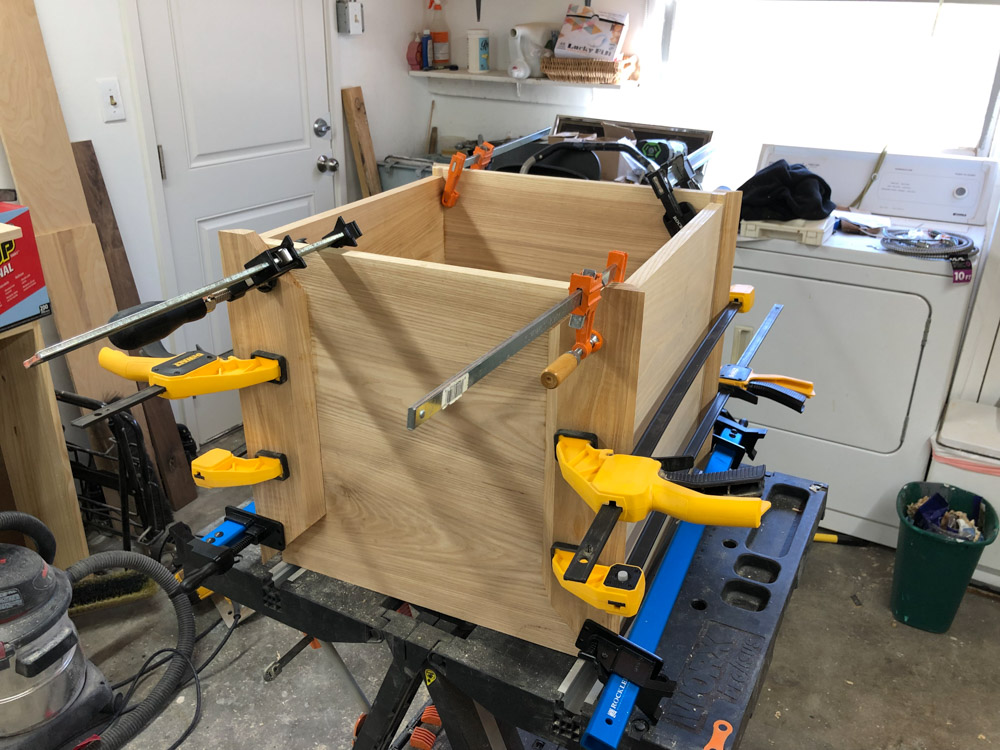
Here's the main box sides glued up. One side is a little taller in order to give the back hinge a little height. More on that shortly.
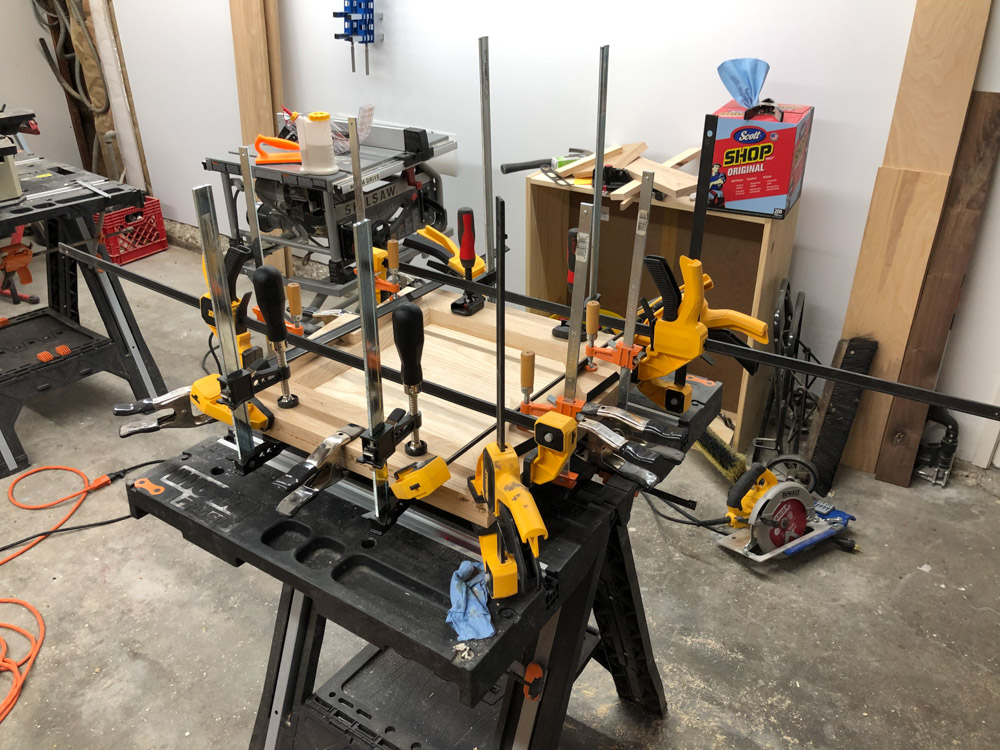
Below you can see the beveled edges being glued to the top.
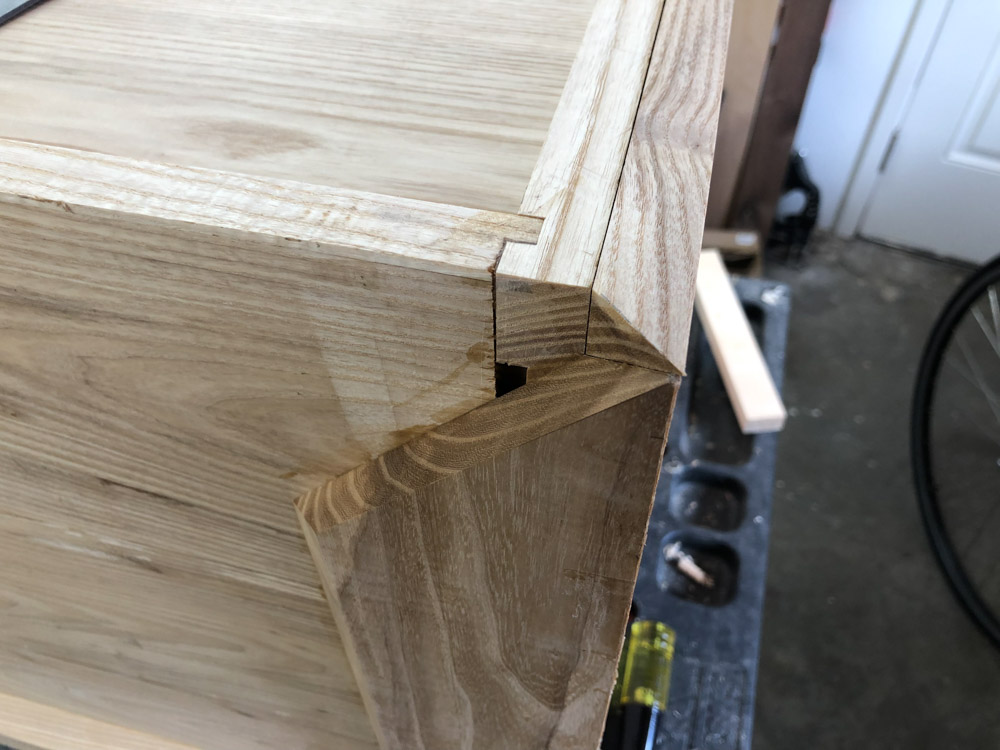
Here's where it starts to get a little tricky. The side have the same chamfered edging, but they are meant to stick up a bit from the side panels, in order to leave a gap below the closed lid (no pinched little fingers), and then also have a miter at the outside edges.
This makes for some unusual meeting of corners at the bottom of each side.
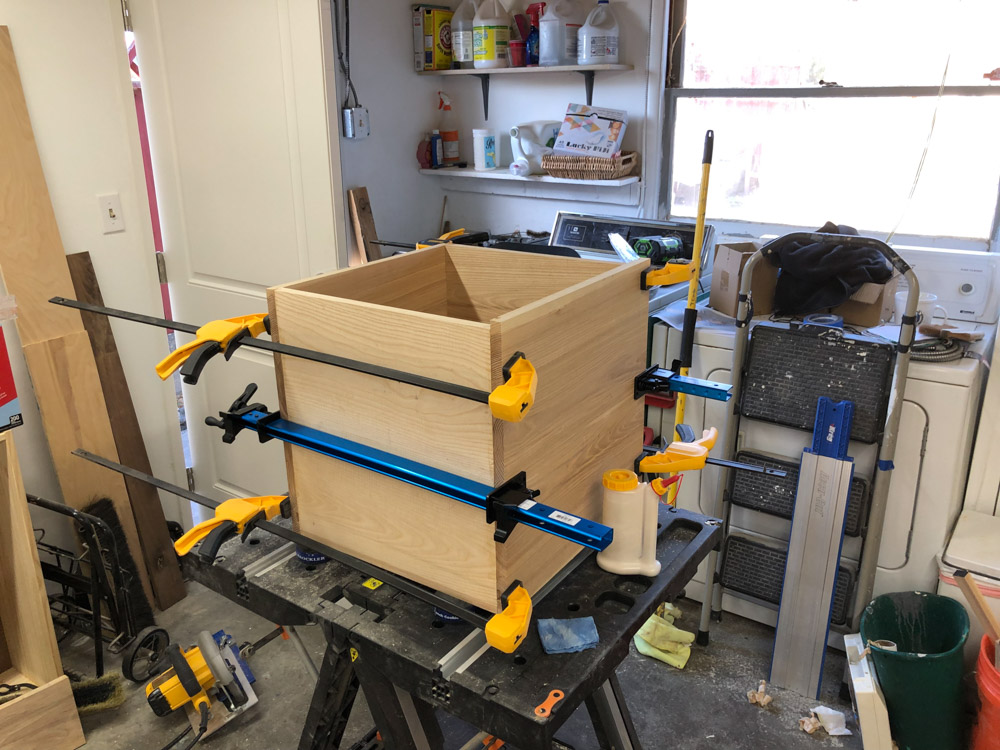
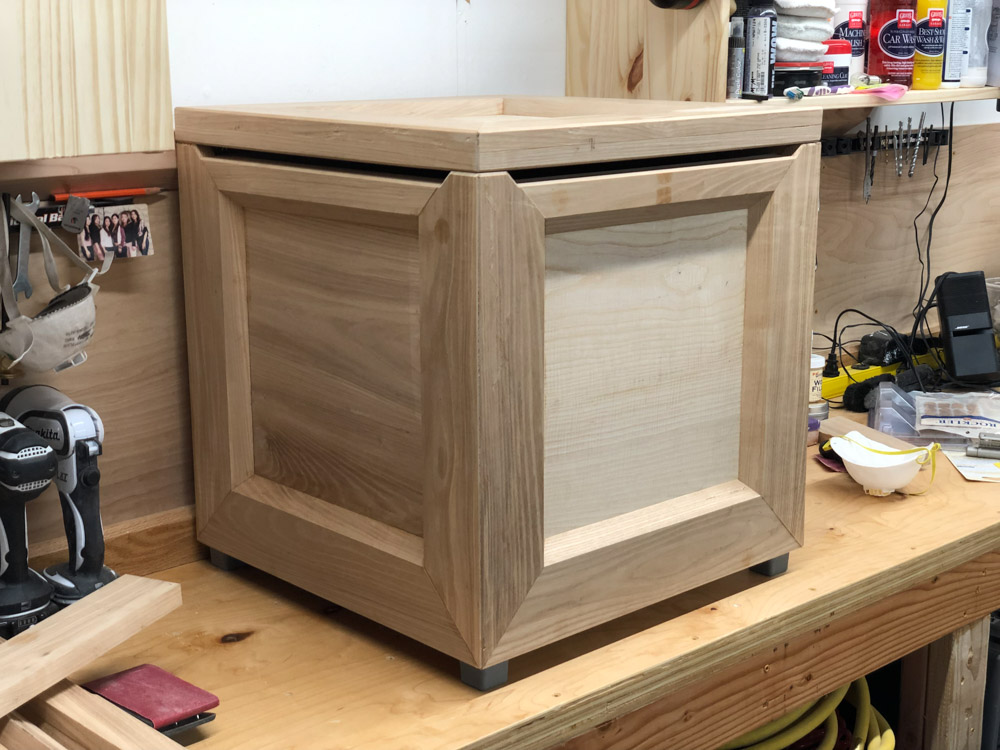
Here's the box all glued up, with the lid set on top.
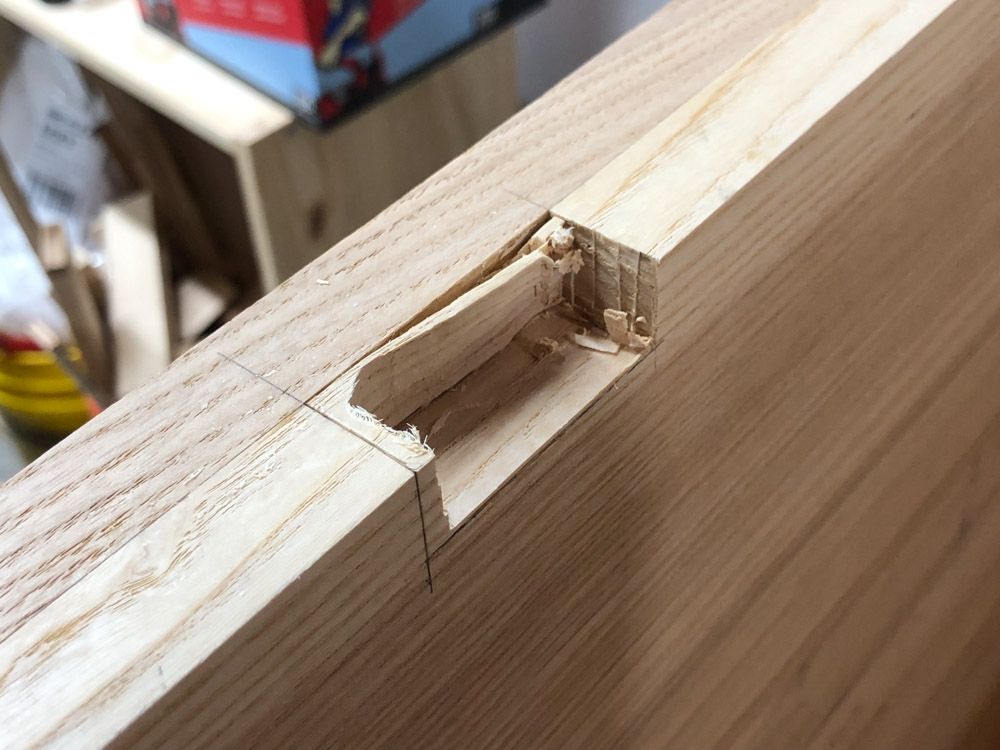
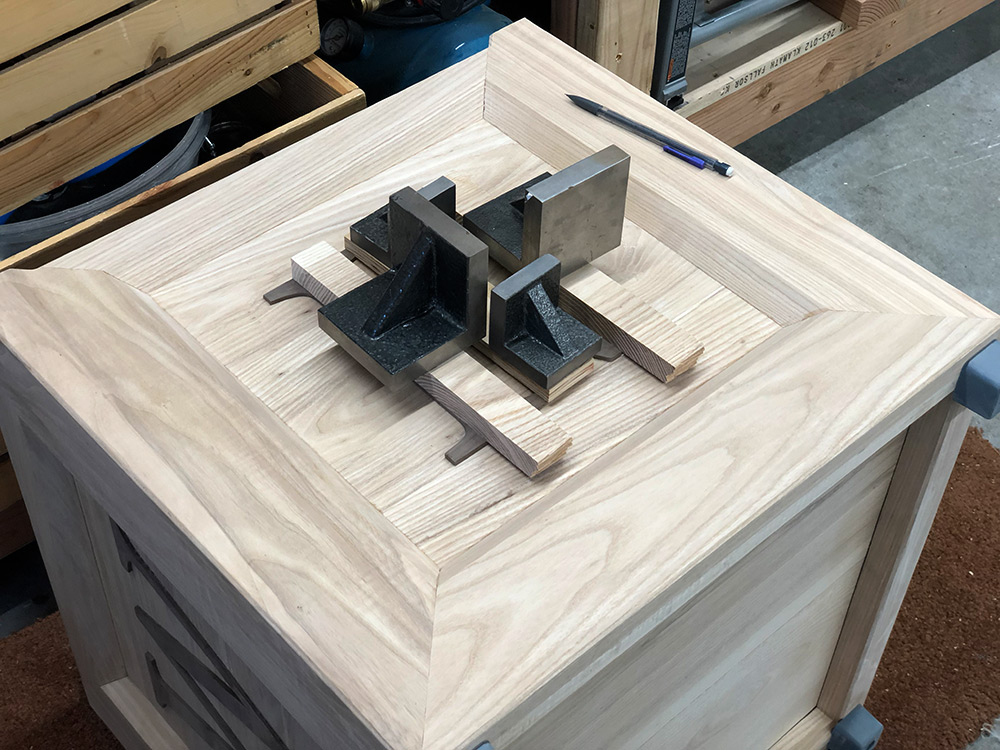
The torsion hinges that I bought (no slammed lids) were only meant to go onto a 3/4" board, not the 1 1/2" thickness I had at the back of the box, so I need to carve out some recesses for them. Probably could have sharpened those chisels a bit more…
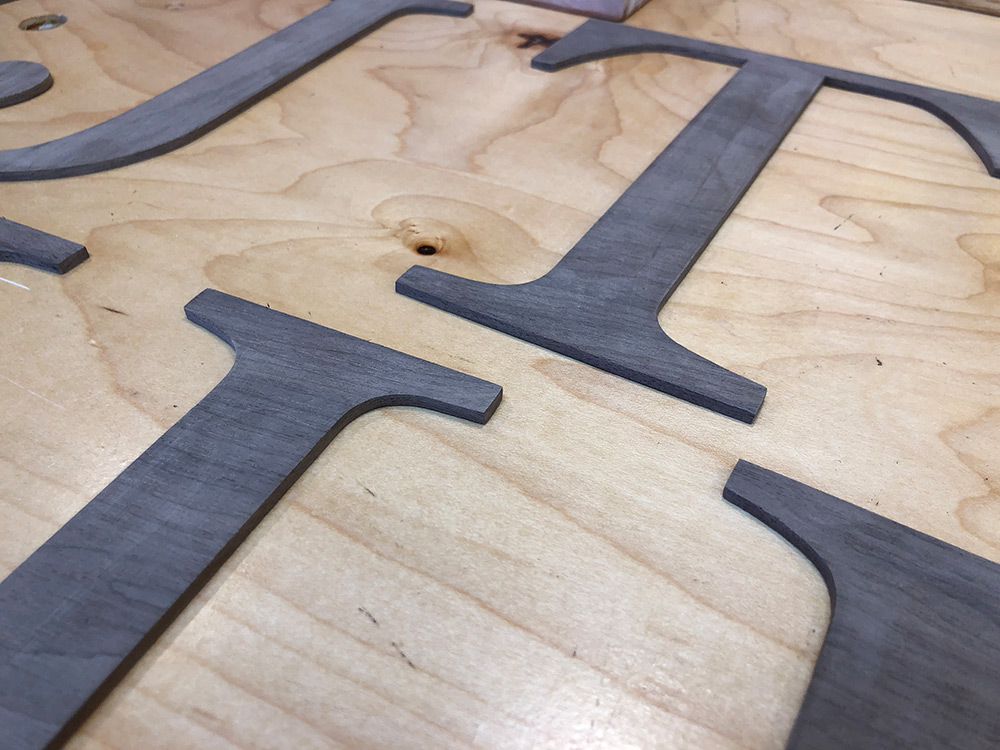
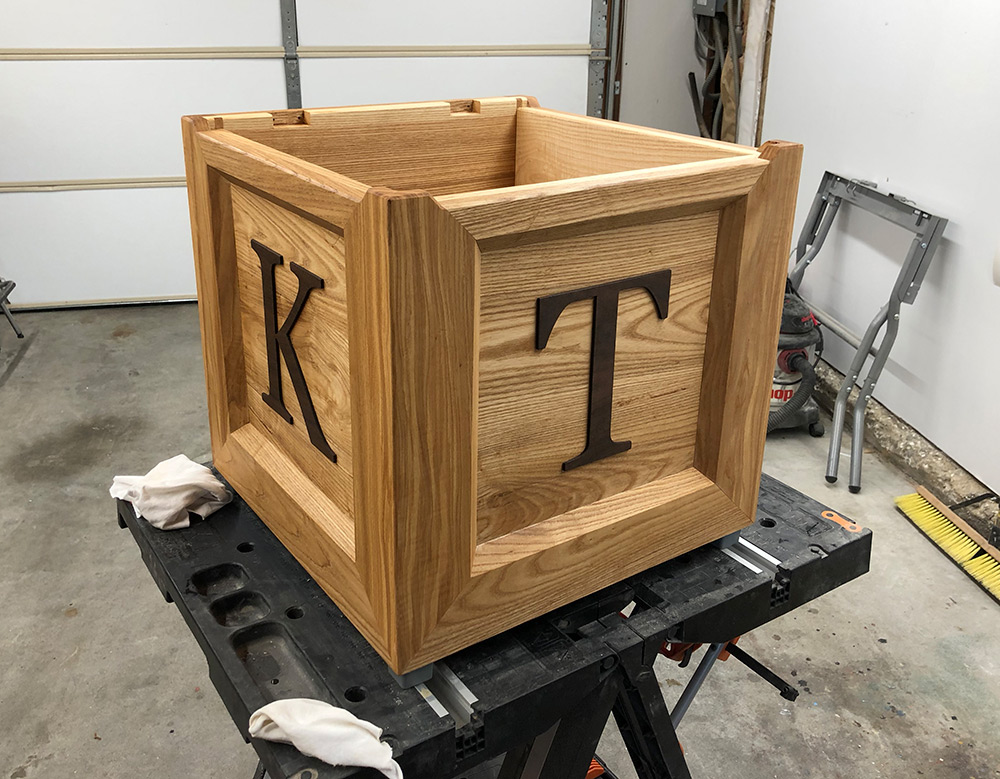
For the letters on the sides of the box, I had some 1/8" walnut laser cut at a local shop. Below you can see it after the burned edges had been sanded clean.
I had some high-tech clamping methods to glue those letters in place.
Finally, before assembly, I finished the box with tung oil (100% kid safe). A bit about tung oil: it smells pleasant and nutty, makes a nice rich finish and takes FOREVER to cure. On top of a few coats of the tung oil went a bit of a beeswax furniture polish (the sort that is used on children's wooden toys).
After finishing the hinges were put in place, chains added so that the top doesn't open TOO far, little rubber bumpers added on the front upper corners, for the lid to land on and non-slip rubber feet added to the bottom.
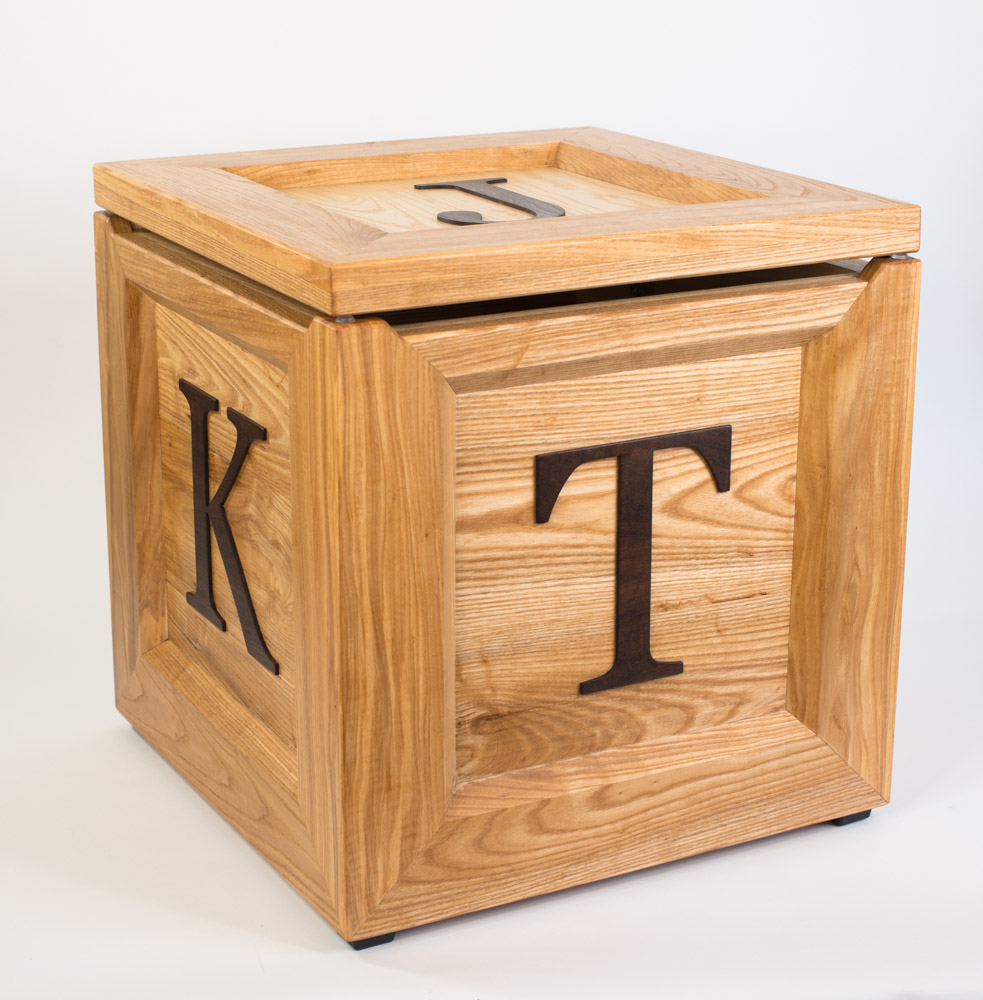
In all, I think the box turned out well and my friends seemed pleased with it :)
Here is a gallery with more photos of the finished product, where you can also see the hinges in action, holding the lid partly open.
Thanks for reading!
Below you can see the couple of images that I ended up with after my design process. I'll talk a bit about the special features as they come up in pictures later on, but the important thing to note is that it is big, heavy and made from solid ash. Did I mention that it is heavy?
This one is light on details and heavy on pictures, so enjoy the show!
As usual, I started with a pile of wood from my local hardwood dealer, and milled it down to 3/4".
After cutting down to rough length, the main side panels were glued up. Below you can see the panel clamps from Rockler that I got for this project. I try to embrace Mike Pekovich's (creative director at Fine Woodworking magazine) theory that you should try to buy a new tool for each project, thereby slowly increasing your set of tools, but also trying out something new.
The panels took a bit of fine tuning, planing, scraping and such to get them smooth and clean.
Turns out that the stock that I bought was an awkward width, being not quite wide enough to use two pieces to make one side. Fortunately, this extra bit should be hidden at the bottom of the inside.
And sometimes you accidentally make a panel just a liiiiiitle bit too narrow.
Here's the main box sides glued up. One side is a little taller in order to give the back hinge a little height. More on that shortly.
Below you can see the beveled edges being glued to the top.
Here's where it starts to get a little tricky. The side have the same chamfered edging, but they are meant to stick up a bit from the side panels, in order to leave a gap below the closed lid (no pinched little fingers), and then also have a miter at the outside edges.
This makes for some unusual meeting of corners at the bottom of each side.
Here's the box all glued up, with the lid set on top.
The torsion hinges that I bought (no slammed lids) were only meant to go onto a 3/4" board, not the 1 1/2" thickness I had at the back of the box, so I need to carve out some recesses for them. Probably could have sharpened those chisels a bit more…
For the letters on the sides of the box, I had some 1/8" walnut laser cut at a local shop. Below you can see it after the burned edges had been sanded clean.
I had some high-tech clamping methods to glue those letters in place.
Finally, before assembly, I finished the box with tung oil (100% kid safe). A bit about tung oil: it smells pleasant and nutty, makes a nice rich finish and takes FOREVER to cure. On top of a few coats of the tung oil went a bit of a beeswax furniture polish (the sort that is used on children's wooden toys).
After finishing the hinges were put in place, chains added so that the top doesn't open TOO far, little rubber bumpers added on the front upper corners, for the lid to land on and non-slip rubber feet added to the bottom.
In all, I think the box turned out well and my friends seemed pleased with it :)
Here is a gallery with more photos of the finished product, where you can also see the hinges in action, holding the lid partly open.
Thanks for reading!
blog comments powered by Disqus