And Picking Back Up Again...
30 - October - 2011 - 20:45
I'm back!
I realize it has been a bit over two months since the last blog update, but I feel as though I have a decent excuse. It turns out that I went and got married about a month ago. So, what with various wedding preparations, the wedding itself and then the honeymoon afterwards, I hardly had any spare moments for working on the ol model. But now that that is all settled and I've got some free time back again, I have finally got a bit of an update.
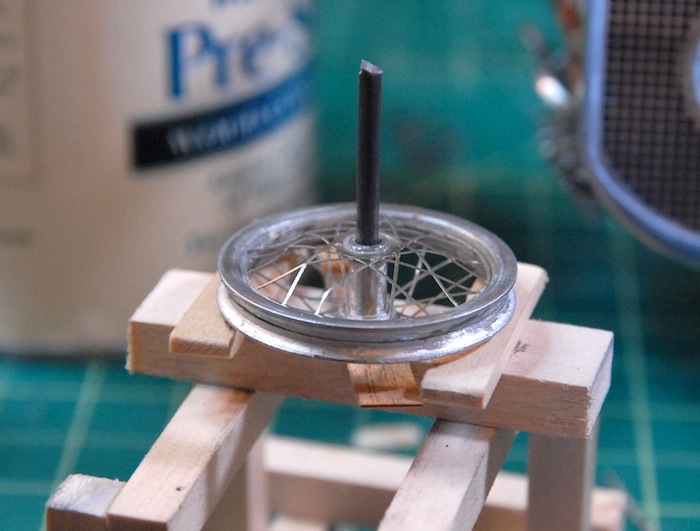
I'm getting into the home stretch now, and the model is beginning to wrap up. I've assembled the wheels, which were a combination of cast hubs and rims and photo-etch spokes. It seems like these sorts of things never fit quite right, and so each wheel has one side that is a little more warped than I would prefer, since the spoke discs were just a hair bigger than they should be. Someone with more patience and some fore knowledge of this might file them all the way around to be just a little smaller, but I'm not and I didn't, so I just bent them into place and called it good.
Below you can see the wheel, and also the little jig that I made from the engine stand and a leftover part of the axle. This setup put the rim and the hub at just the right offset to keep everything centered nicely.
While that was going on, I also was working on putting the gear assembly together. It was a fairly simple setup, with the same fitting of metal parts to wood that was required on the interwing struts that I put together earlier in the build, but haven't fitted to the plane yet. With a bit of sanding and shaping, the various wooden parts were contoured and smoothed. Since this gear was going to have to support the weight of the model, which, with the engine in there, is not insubstantial, I decided to do a little reinforcing of the joints. I drilled a few holes through the joint/hub part (where everything connects) and put some metal rods through that and into each other piece of wood. Hopefully this will add enough strength to keep everything happy attached.
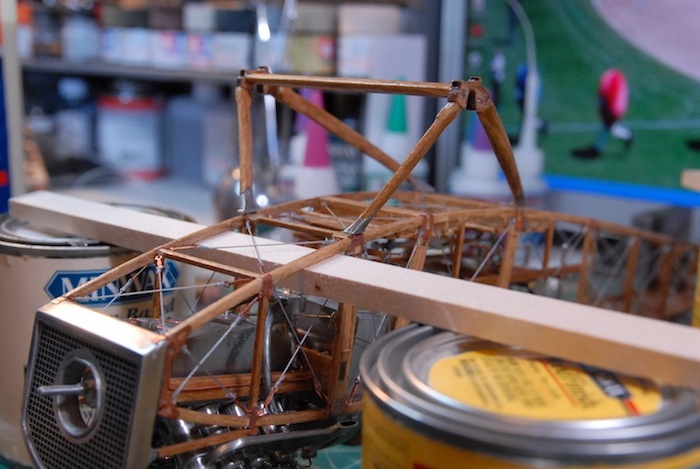
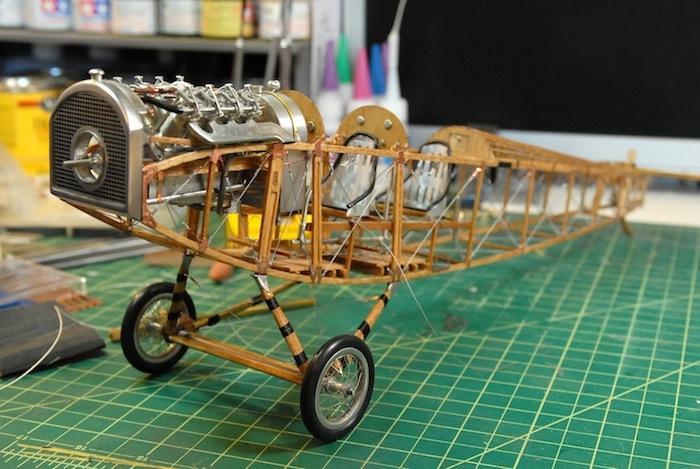
With some O-rings stretched around the wheels for tires and some string wrapped around the landing gear, the plane is finally standing on it's own legs! On a side note, there is a tail skid that Ive finished as well, but I don't have any photos of that handy, so look for that next time.
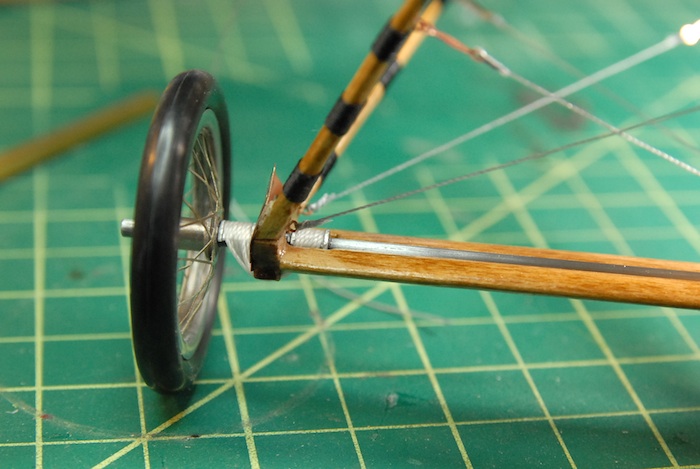
Here is a close up of the wrapped string. On the full-size plane, this added reinforcement to the wood, perhaps keeping it from splitting on landing. On the model, it is just nylon string glued in place with a dab of superglue.
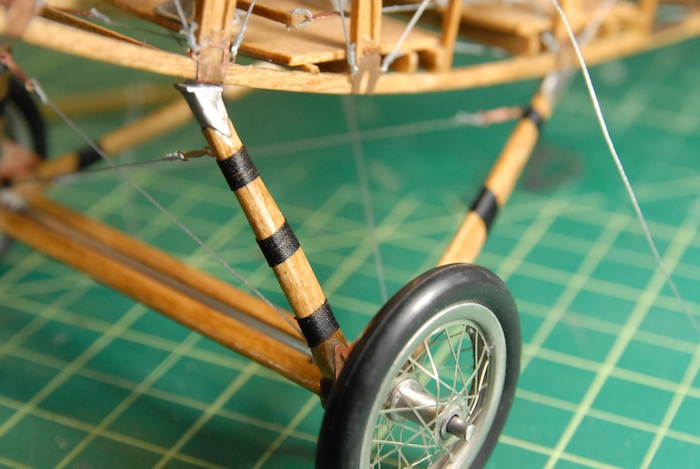
To simulate the simple bungie-cord-like suspension that the plane had, the model has a couple of metal fittings and some wrapped white string. This is actually holding the axle in place, though, so I had to be sure it was good and tight. Once in place, a dab of superglue made sure it wasn't going to go anywhere.
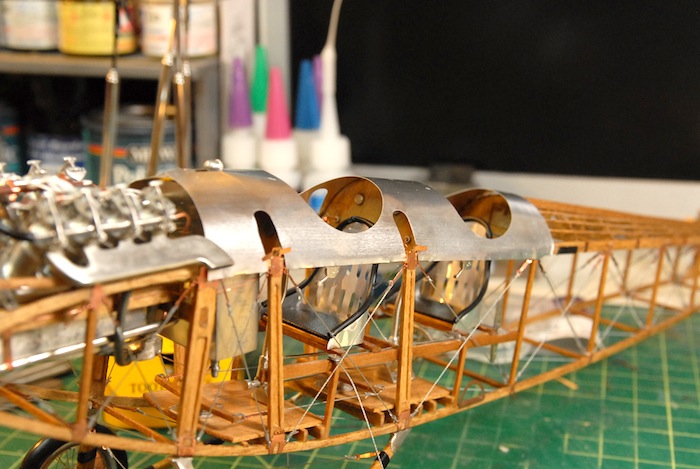
Finally, bringing the blog up to what I was working on just a few hours ago, the aluminum cowl around the cockpit in in progress. Below you can see it bend into place. I used the plank-soaking tube that I made for the Armed Virginia Sloop model (out of some simple PVC pipe) as a form to bend the metal over. The metal just gets bent a bit and then glued into place with the help of a few tabs that wrap under the wooden longerons.
Next up: windshields, cowling trim, and beginning to put all of the parts together!
I realize it has been a bit over two months since the last blog update, but I feel as though I have a decent excuse. It turns out that I went and got married about a month ago. So, what with various wedding preparations, the wedding itself and then the honeymoon afterwards, I hardly had any spare moments for working on the ol model. But now that that is all settled and I've got some free time back again, I have finally got a bit of an update.
I'm getting into the home stretch now, and the model is beginning to wrap up. I've assembled the wheels, which were a combination of cast hubs and rims and photo-etch spokes. It seems like these sorts of things never fit quite right, and so each wheel has one side that is a little more warped than I would prefer, since the spoke discs were just a hair bigger than they should be. Someone with more patience and some fore knowledge of this might file them all the way around to be just a little smaller, but I'm not and I didn't, so I just bent them into place and called it good.
Below you can see the wheel, and also the little jig that I made from the engine stand and a leftover part of the axle. This setup put the rim and the hub at just the right offset to keep everything centered nicely.

While that was going on, I also was working on putting the gear assembly together. It was a fairly simple setup, with the same fitting of metal parts to wood that was required on the interwing struts that I put together earlier in the build, but haven't fitted to the plane yet. With a bit of sanding and shaping, the various wooden parts were contoured and smoothed. Since this gear was going to have to support the weight of the model, which, with the engine in there, is not insubstantial, I decided to do a little reinforcing of the joints. I drilled a few holes through the joint/hub part (where everything connects) and put some metal rods through that and into each other piece of wood. Hopefully this will add enough strength to keep everything happy attached.

With some O-rings stretched around the wheels for tires and some string wrapped around the landing gear, the plane is finally standing on it's own legs! On a side note, there is a tail skid that Ive finished as well, but I don't have any photos of that handy, so look for that next time.

Here is a close up of the wrapped string. On the full-size plane, this added reinforcement to the wood, perhaps keeping it from splitting on landing. On the model, it is just nylon string glued in place with a dab of superglue.

To simulate the simple bungie-cord-like suspension that the plane had, the model has a couple of metal fittings and some wrapped white string. This is actually holding the axle in place, though, so I had to be sure it was good and tight. Once in place, a dab of superglue made sure it wasn't going to go anywhere.

Finally, bringing the blog up to what I was working on just a few hours ago, the aluminum cowl around the cockpit in in progress. Below you can see it bend into place. I used the plank-soaking tube that I made for the Armed Virginia Sloop model (out of some simple PVC pipe) as a form to bend the metal over. The metal just gets bent a bit and then glued into place with the help of a few tabs that wrap under the wooden longerons.

Next up: windshields, cowling trim, and beginning to put all of the parts together!
blog comments powered by Disqus
