
Repairing a few Older Projects
01 - December - 2013 - 13:55
Before I move on to the next model build, I wanted to put up a quick post that had some updates from previous projects.
Repair #1:
So, after I completed the Panzer and BMW motorcycle models, I put them together into one display case, and took them to my office at work for display. I was bringing various other models in at the same time, in various other display cases. Some of those cases had the plastic tops that snapped to the bases and some had the tops that just sat on the bases. Unfortunately, when I picked up the case that held the tank and motorcycle, I THOUGHT it was one that snapped together, but it wasn't. This resulted in the lower half of the case dropping to the table and then bouncing onto the floor, doing a bit of damage to both models, which were wired to the base.
I was pretty mad at myself for making such a mistake and, after a great deal of cursing, decided to put the models and all the broken pieces back in the case, and the case back into its box, to be fixed later. Fast forward a year or two and I finally felt like I was able to open the box up and see how hard it would be to repair the models. Fortunately, it turned out to be pretty easy! Below you can see the two models and their detached parts all spread out, ready for fixing.
The tank lost a few hatches, some road wheels and some chunks of track. A bit of time with some plastic cement and it was good as new. I also took the opportunity to repose some of the hatches into a more natural position, but forgot to take a picture of the finished project. Just imagine that those engine hatches are no longer sticking straight up :)
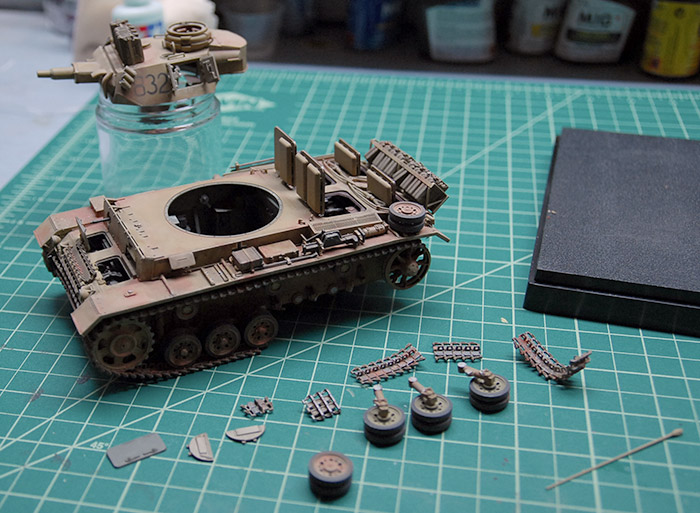
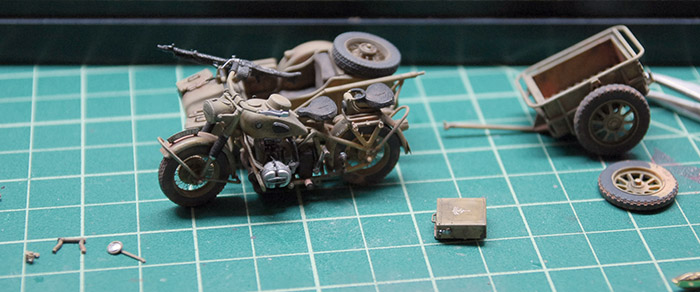
The motorcycle just needed a few small parts reattached.
Repair #2:
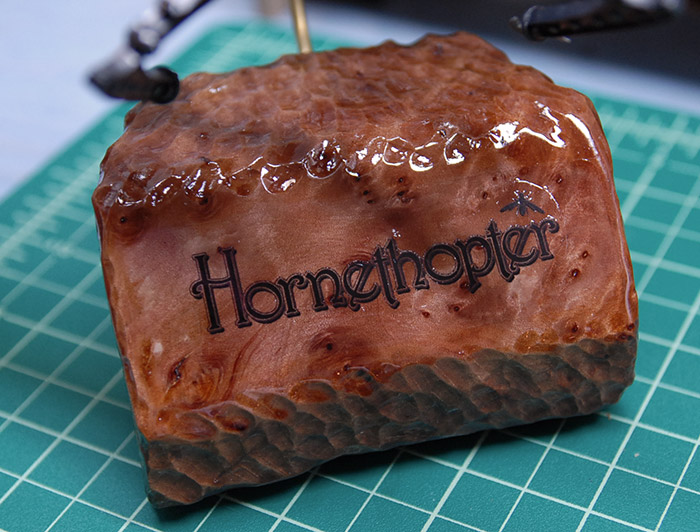
The Hornethopter model itself wasn't damaged, but the base that I built for it ended up throwing me for a loop. I have since learned that the chunk of wood that I bought for the base, which was a 'turning block', was actually pretty wet wood. The turning blocks come with a wax coating, which keeps the moisture in the wood, presumably making it better for turning on a lathe. When I prepared the block, I burned off the wax, cut the shape that I needed and carved it a bit. I put some polyurethane on there, attached the brass name plate, tube for the model and some felt dots on the bottom and called it done.
Fast forward a few months, after the model had been sitting under a bell jar at work, and the moisture had all evaporated from the block of wood. As the wood lost its moisture, it also shrunk. It shrunk enough to significantly buckle the brass name plate. I brought the model home, thinking that I could pop the plate off, and re-glue it into place. Unfortunately, the plate didn't really want to flatten out properly, so I decided to go a different route. I scanned the hornethopter logo and printed it out onto clear decal sheet. I sanded the glue off of the front of the wood block, made it smooth again and gave it a coat of gloss polyurethane. Then I put the decal on there, where the plate used to be, and gave it a few more coats of gloss polyurethane. Good as new!
Repair #1:
So, after I completed the Panzer and BMW motorcycle models, I put them together into one display case, and took them to my office at work for display. I was bringing various other models in at the same time, in various other display cases. Some of those cases had the plastic tops that snapped to the bases and some had the tops that just sat on the bases. Unfortunately, when I picked up the case that held the tank and motorcycle, I THOUGHT it was one that snapped together, but it wasn't. This resulted in the lower half of the case dropping to the table and then bouncing onto the floor, doing a bit of damage to both models, which were wired to the base.
I was pretty mad at myself for making such a mistake and, after a great deal of cursing, decided to put the models and all the broken pieces back in the case, and the case back into its box, to be fixed later. Fast forward a year or two and I finally felt like I was able to open the box up and see how hard it would be to repair the models. Fortunately, it turned out to be pretty easy! Below you can see the two models and their detached parts all spread out, ready for fixing.
The tank lost a few hatches, some road wheels and some chunks of track. A bit of time with some plastic cement and it was good as new. I also took the opportunity to repose some of the hatches into a more natural position, but forgot to take a picture of the finished project. Just imagine that those engine hatches are no longer sticking straight up :)
The motorcycle just needed a few small parts reattached.
Repair #2:
The Hornethopter model itself wasn't damaged, but the base that I built for it ended up throwing me for a loop. I have since learned that the chunk of wood that I bought for the base, which was a 'turning block', was actually pretty wet wood. The turning blocks come with a wax coating, which keeps the moisture in the wood, presumably making it better for turning on a lathe. When I prepared the block, I burned off the wax, cut the shape that I needed and carved it a bit. I put some polyurethane on there, attached the brass name plate, tube for the model and some felt dots on the bottom and called it done.
Fast forward a few months, after the model had been sitting under a bell jar at work, and the moisture had all evaporated from the block of wood. As the wood lost its moisture, it also shrunk. It shrunk enough to significantly buckle the brass name plate. I brought the model home, thinking that I could pop the plate off, and re-glue it into place. Unfortunately, the plate didn't really want to flatten out properly, so I decided to go a different route. I scanned the hornethopter logo and printed it out onto clear decal sheet. I sanded the glue off of the front of the wood block, made it smooth again and gave it a coat of gloss polyurethane. Then I put the decal on there, where the plate used to be, and gave it a few more coats of gloss polyurethane. Good as new!
GT-R Complete & Photos
08 - August - 2010 - 10:07
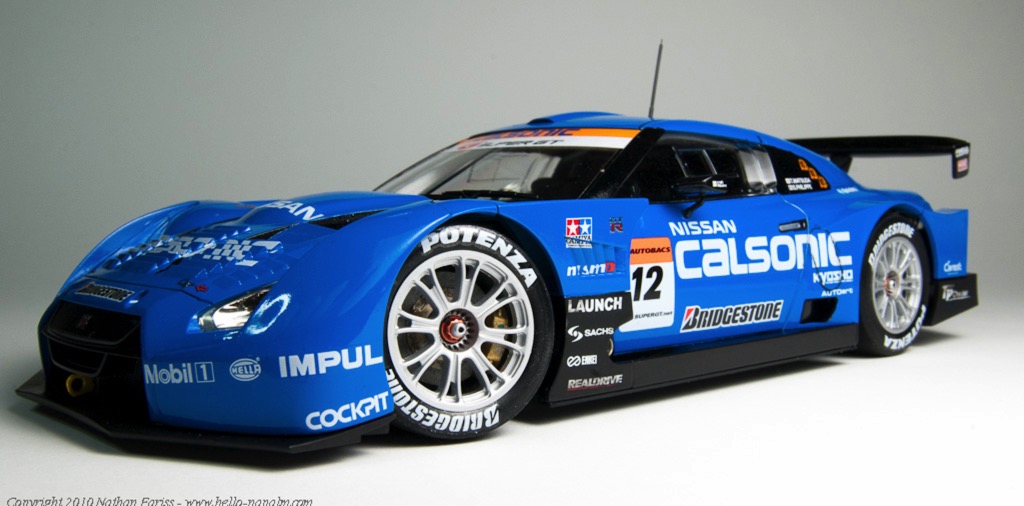
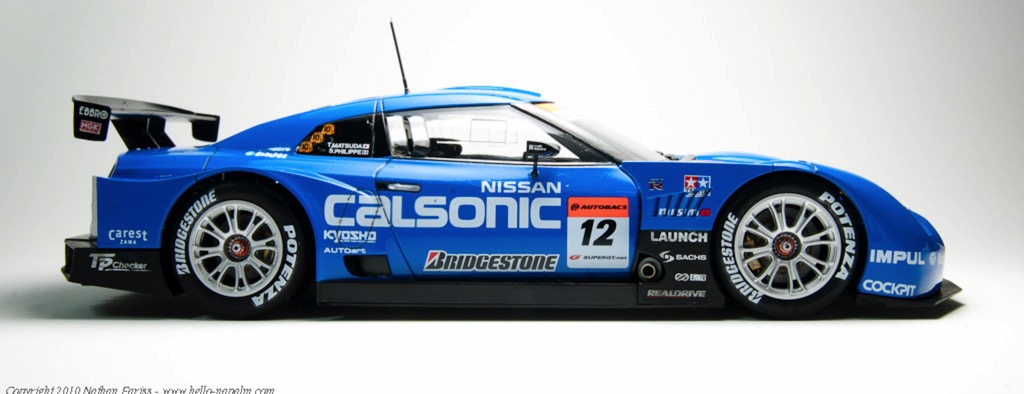
I've wrapped up the build of the Tamiya GT-R kit. By the time I was finishing up this kit, I was remembering why is was that I tried a wooden kit in the first place. I get worn out on all the painting, the frustrations of various paint types not agreeing with one another, and the fragility of decals. Although at least with this project, I took away a few valuable lessons that I can keep in mind for future similar projects. Here are a few tidbits to remember:
- If it is going to be shiny, use lacquer. Tamiya's gloss acrylics just never behave when airbrushed.
- Don't use the microSOL (aka Decal Melter) until the decal is in it's final place and already partly dry.
- If some of it will be painted over, remove the underlying chrome plating first, otherwise, the paint will just chip off, despite using primer.
- Give the aforementioned lacquer PLENTY of time to dry before putting masking tape on it. Probably should wait 24 hours before trying.
- One should probably order a second set of decals for a project like this, as some are sure to be damaged. Alternately, perhaps one could scan them, and buy a self-print decal sheet so one could make replacements (although I'm not sure about the quality difference here)
- Third party racing harness kits, while pretty cool, might not be worth the effort unless the car is an open wheel type.
Anyhow, with this project completed, I spent a few minutes photographing but this car and the last project (WWII BMW r75 motorcycle). I recently purchased a new lens, which has some macro capabilities, and tried that out on this shoot. I am pretty pleased with the results. Here are a few images of the completed models:
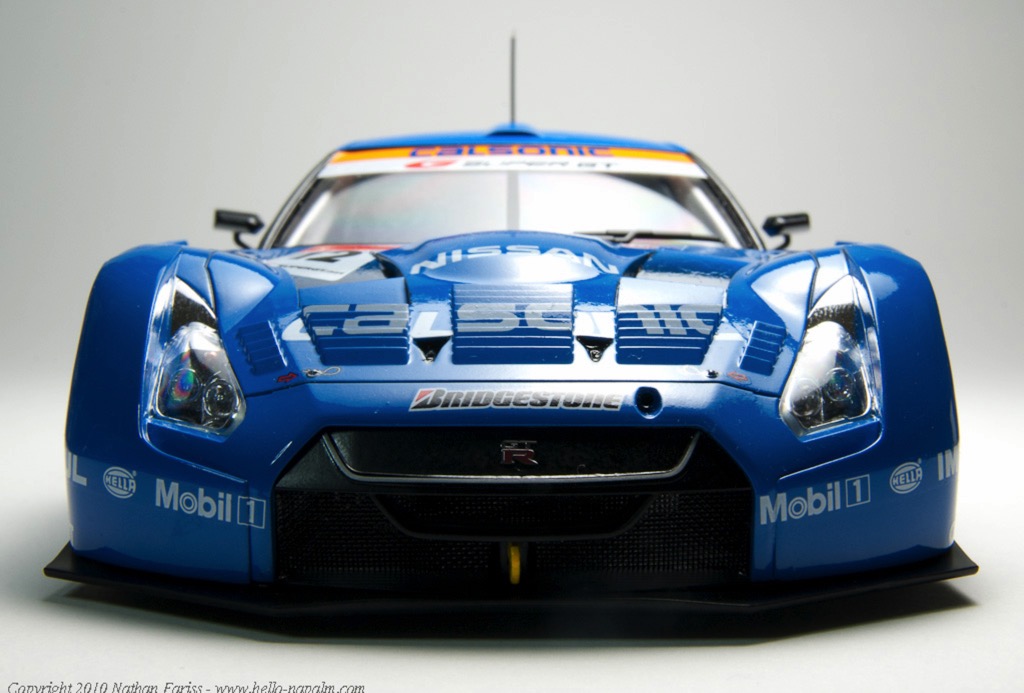
The full galleries are online and can be seen in the completed models section of this web site.
Next up: Model Airways' Curtis 'Jenny' wooden plane. Stay tuned for more model adventures!
- If it is going to be shiny, use lacquer. Tamiya's gloss acrylics just never behave when airbrushed.
- Don't use the microSOL (aka Decal Melter) until the decal is in it's final place and already partly dry.
- If some of it will be painted over, remove the underlying chrome plating first, otherwise, the paint will just chip off, despite using primer.
- Give the aforementioned lacquer PLENTY of time to dry before putting masking tape on it. Probably should wait 24 hours before trying.
- One should probably order a second set of decals for a project like this, as some are sure to be damaged. Alternately, perhaps one could scan them, and buy a self-print decal sheet so one could make replacements (although I'm not sure about the quality difference here)
- Third party racing harness kits, while pretty cool, might not be worth the effort unless the car is an open wheel type.
Anyhow, with this project completed, I spent a few minutes photographing but this car and the last project (WWII BMW r75 motorcycle). I recently purchased a new lens, which has some macro capabilities, and tried that out on this shoot. I am pretty pleased with the results. Here are a few images of the completed models:
The full galleries are online and can be seen in the completed models section of this web site.
Next up: Model Airways' Curtis 'Jenny' wooden plane. Stay tuned for more model adventures!
A Sneak Preview
19 - June - 2010 - 08:22
Just a quick post to bring things up to date. Here's a quick look at upcoming projects.
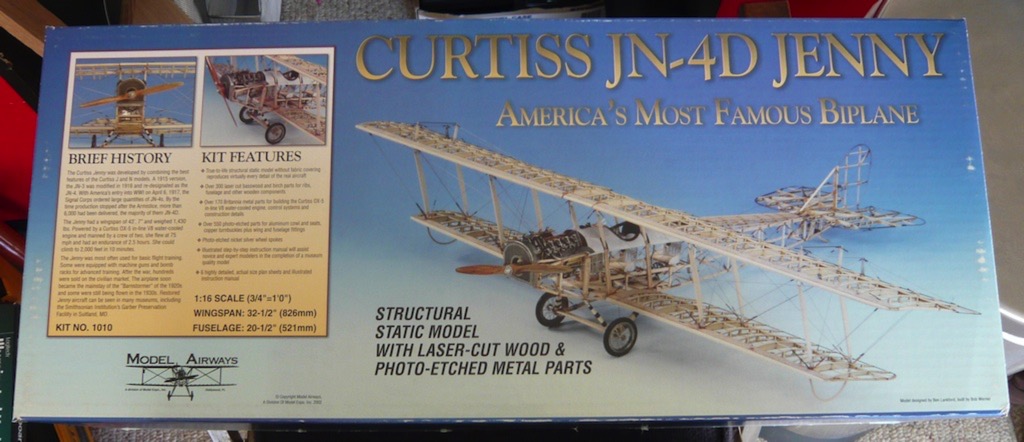
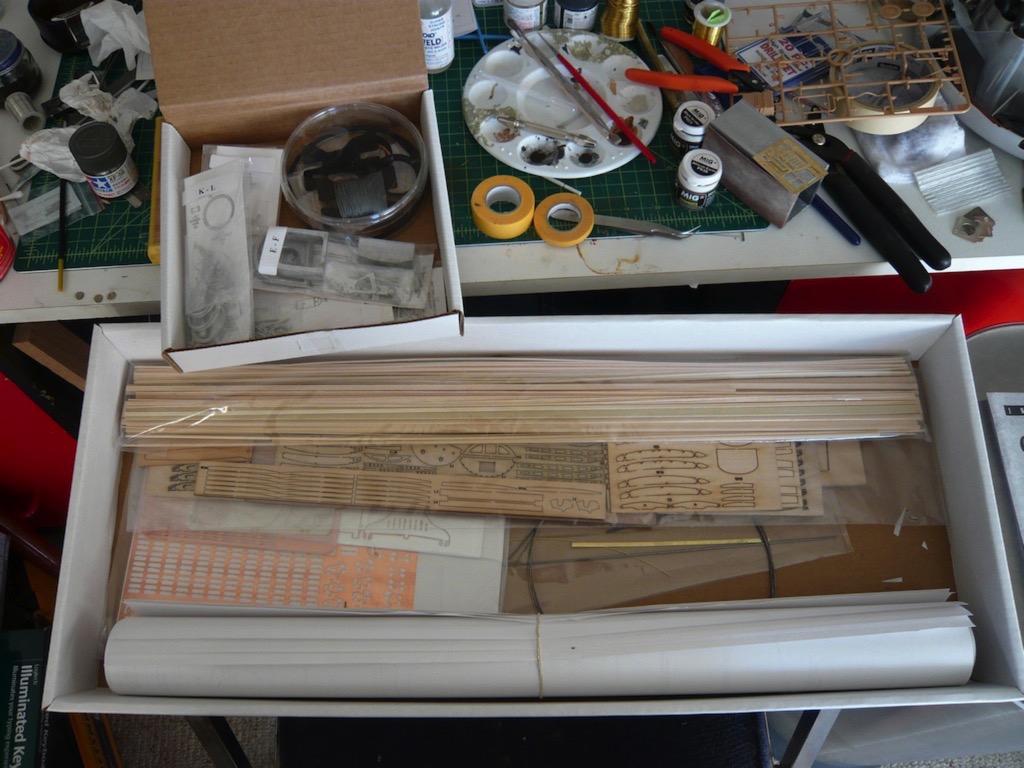
This past week I received a kit for another wooden and metal model. This one is a WWI biplane, the Curtiss JN-4D 'Jenny'. I'm hoping that it'll be a challenging build, similar to the Sloop build, except with much more metal and photo-etch. I'm actually hoping to set up a time-lapse recording method for this build, using an old computer, and a webcam. But since I think this might take me a little bit to get set up and tested, I'm going to hold off on starting this build for a little while.
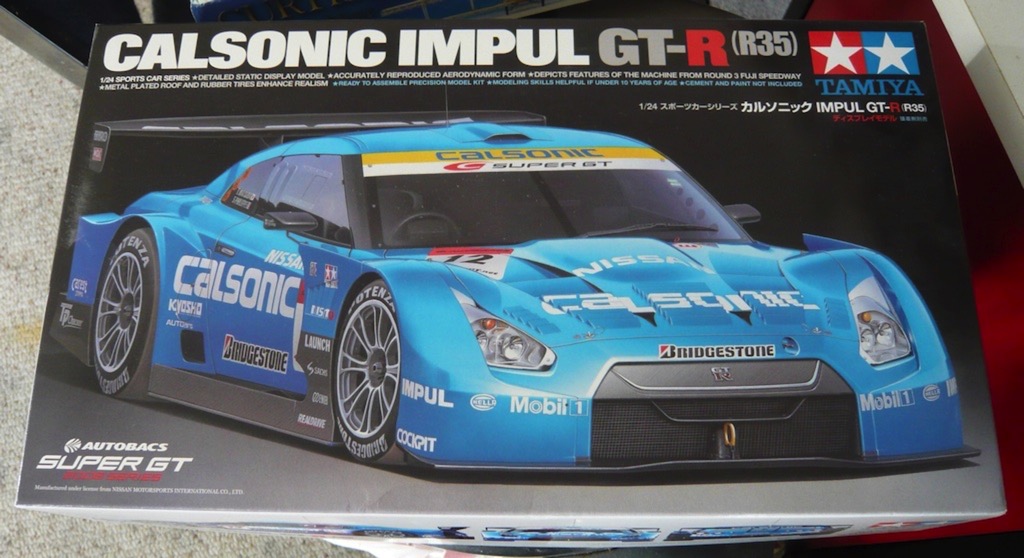
So, in the meantime, after wrapping up the motorcycle model (which I plan on doing today), I'll be putting this one together:
It should be a quick, fun build, since there isn't any engine. I was in the mood to make something shiny before I start on a longer build, so I figure I can crank through this one in a few weeks, and should be able to test out my time-lapse setup in the process :)
And there we have it. That's my modeling progress brought up to date. Party on.
This past week I received a kit for another wooden and metal model. This one is a WWI biplane, the Curtiss JN-4D 'Jenny'. I'm hoping that it'll be a challenging build, similar to the Sloop build, except with much more metal and photo-etch. I'm actually hoping to set up a time-lapse recording method for this build, using an old computer, and a webcam. But since I think this might take me a little bit to get set up and tested, I'm going to hold off on starting this build for a little while.
So, in the meantime, after wrapping up the motorcycle model (which I plan on doing today), I'll be putting this one together:
It should be a quick, fun build, since there isn't any engine. I was in the mood to make something shiny before I start on a longer build, so I figure I can crank through this one in a few weeks, and should be able to test out my time-lapse setup in the process :)
And there we have it. That's my modeling progress brought up to date. Party on.
And Moving Right Along....
19 - June - 2010 - 08:00
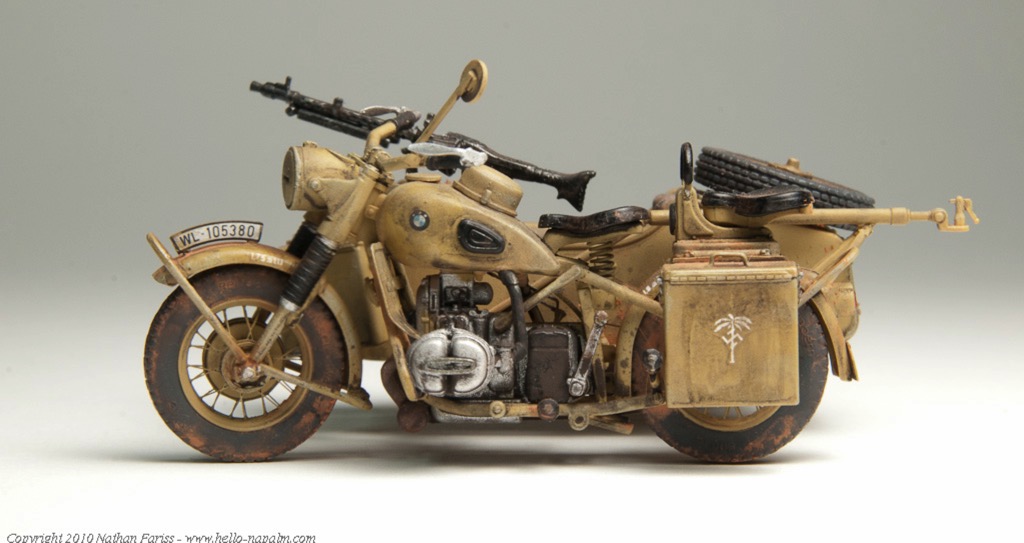
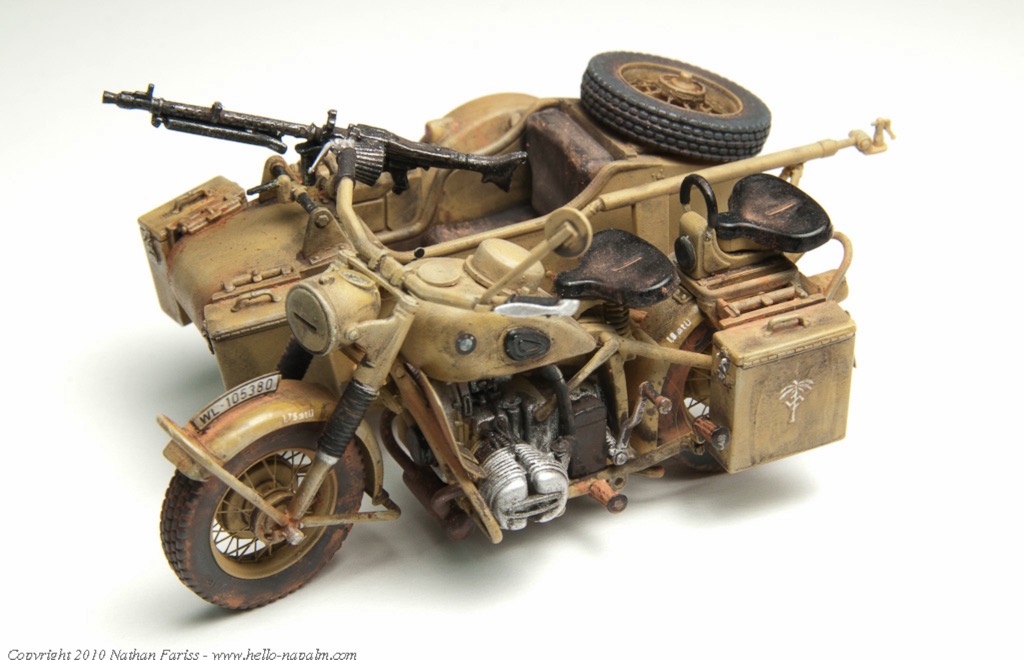
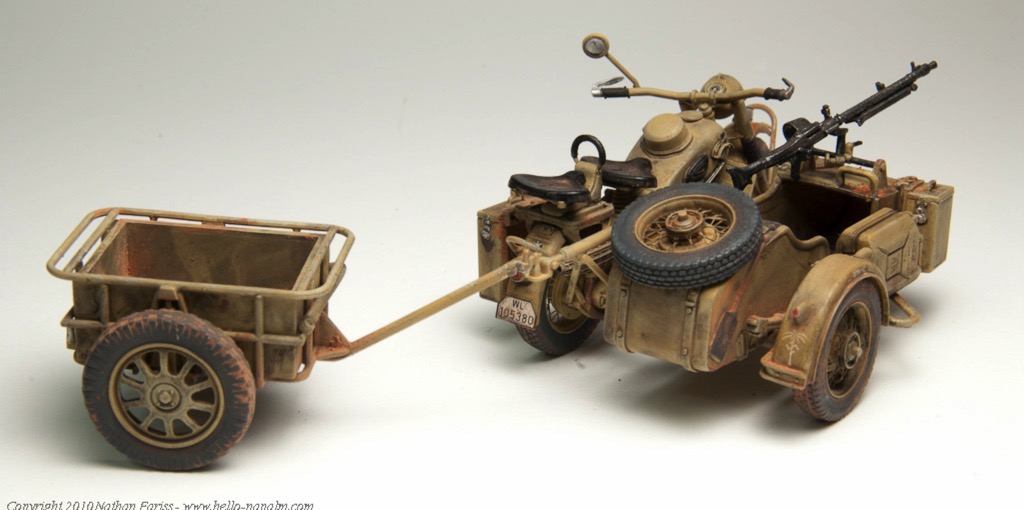
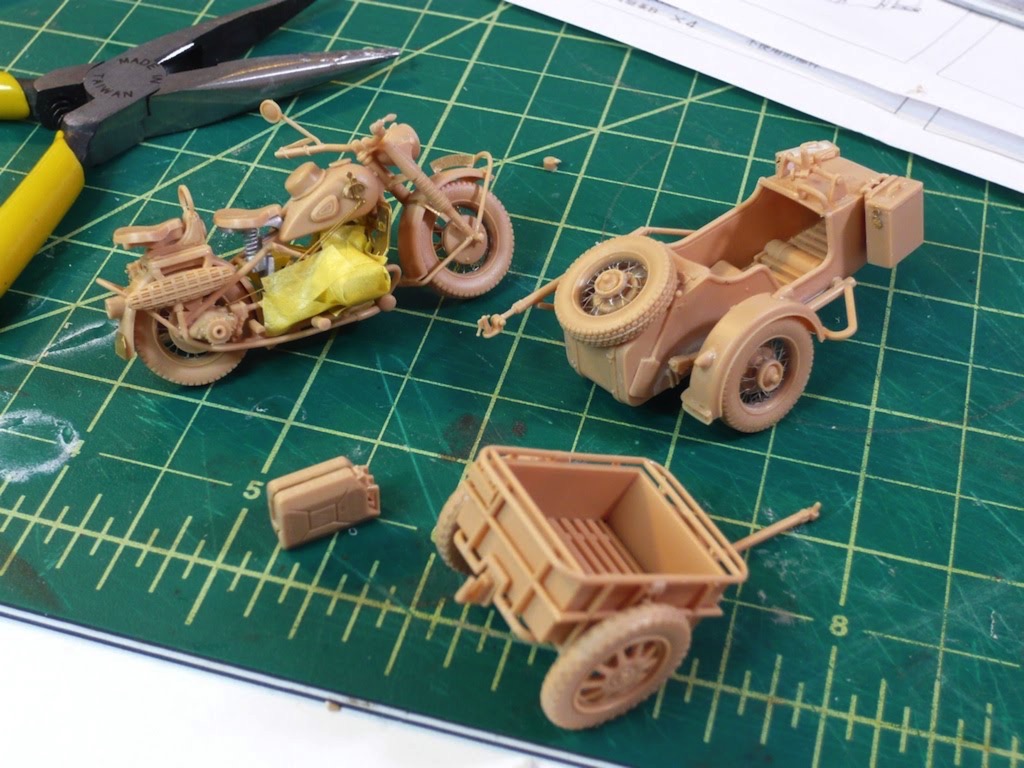
I didn't rest long after wrapping up the Panzer. I jumped right into another vehicle of the same era and same scale. This kit is a BMW R75, manufactured by Lions Roar. I'm not adding any after market parts to this one, but it comes with quite a bit of detail out of the box. It's got a variety of photo-etched parts for the wheel spokes, various engine bits and for a few other small details, like the padlocks on equipment boxes. The kit also comes with a sidecar and two versions of a little trailer.
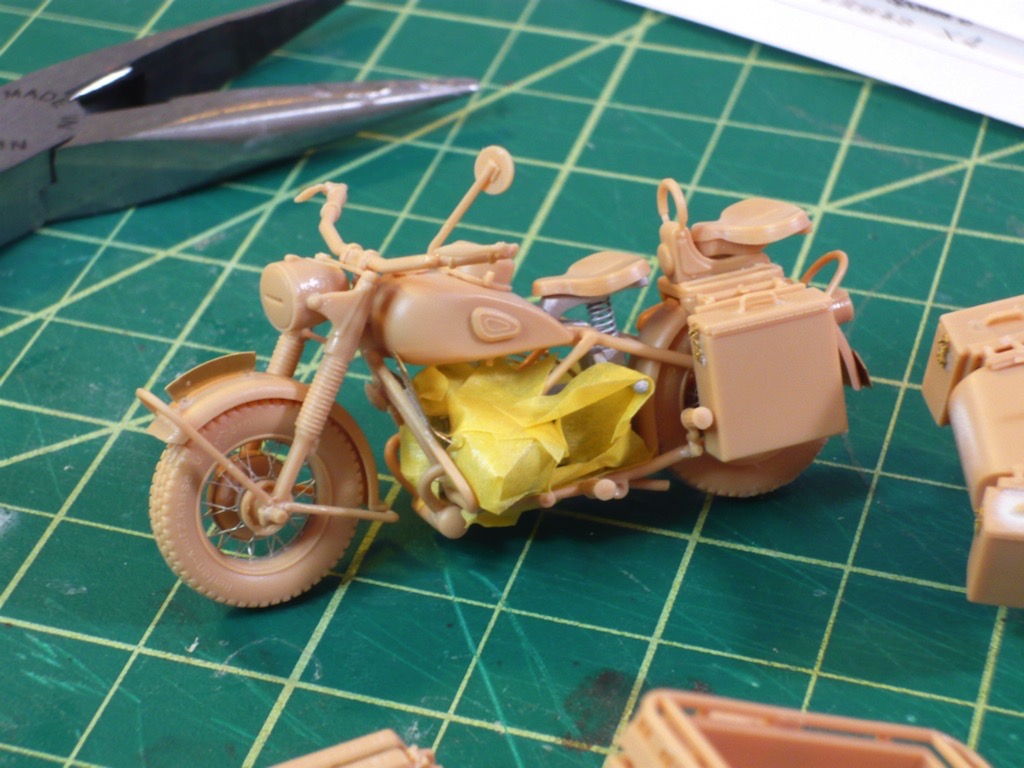
The build was pretty straightforward, with the exception of things just being very very small. The motorcycle is the same scale as the last tank model I built, at 1/35 scale. This makes the whole bike only a few inches long. As you can see from the photos below, there is a pretty good amount of detail in the kit. Also, overall the quality of the kit modeling, while pretty good, was not quite as good as the Panzer kit (which was made by Dragon), so required a good deal more cleanup of mold seams, etc. With the parts being as tiny as they were, this cleanup occasionally resulted in broken parts. This also led me to be fairly certain that I like working on larger models :)
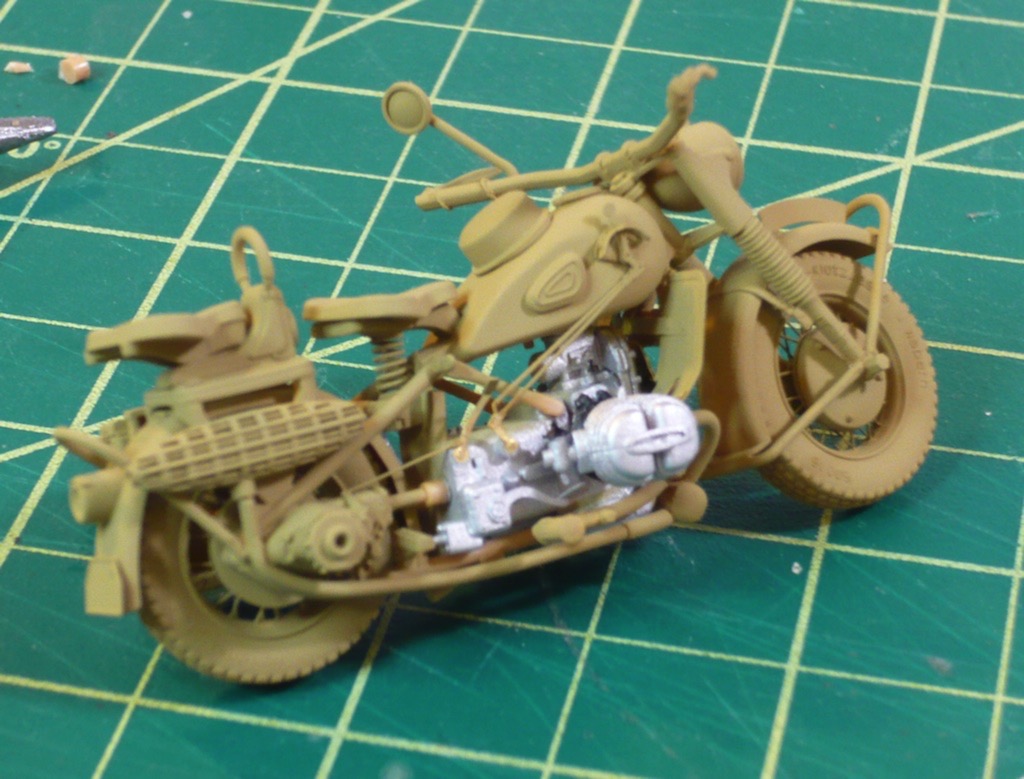
I'm currently working on wrapping this project up, with weathering powders, etc, but as it's not quite done, here are a few photos of the model as of last weekend. My hope for this one is to combine it with the Panzer for display, so that I can put them both on the same wooden base. This just means that I've got to be sure they generally match color-wise and look like they've been living in the same world.
Assembled in sections, engine masked for painting the body.
After a base coat of dark yellow.
The build was pretty straightforward, with the exception of things just being very very small. The motorcycle is the same scale as the last tank model I built, at 1/35 scale. This makes the whole bike only a few inches long. As you can see from the photos below, there is a pretty good amount of detail in the kit. Also, overall the quality of the kit modeling, while pretty good, was not quite as good as the Panzer kit (which was made by Dragon), so required a good deal more cleanup of mold seams, etc. With the parts being as tiny as they were, this cleanup occasionally resulted in broken parts. This also led me to be fairly certain that I like working on larger models :)
I'm currently working on wrapping this project up, with weathering powders, etc, but as it's not quite done, here are a few photos of the model as of last weekend. My hope for this one is to combine it with the Panzer for display, so that I can put them both on the same wooden base. This just means that I've got to be sure they generally match color-wise and look like they've been living in the same world.
Assembled in sections, engine masked for painting the body.
After a base coat of dark yellow.