
July 2009
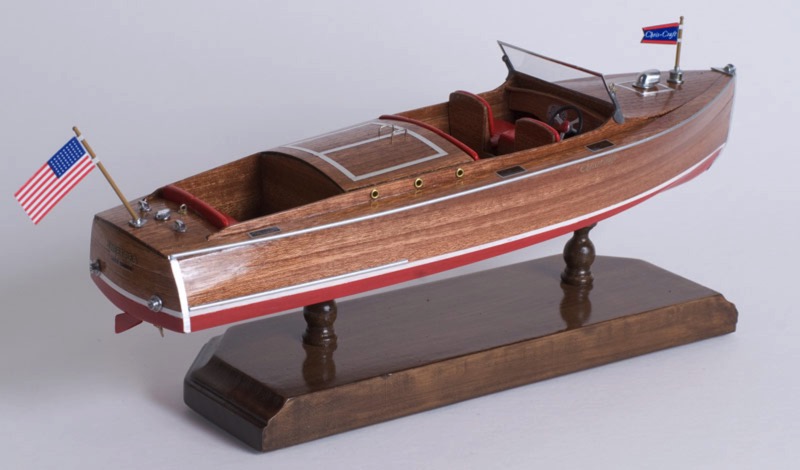
Armed Virginia Sloop - All Decking Complete
26 - July - 2009 - 20:44
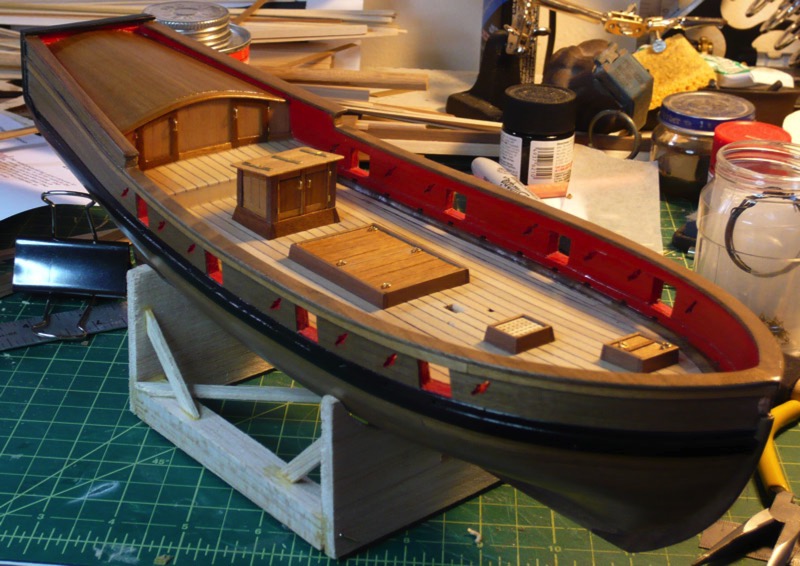
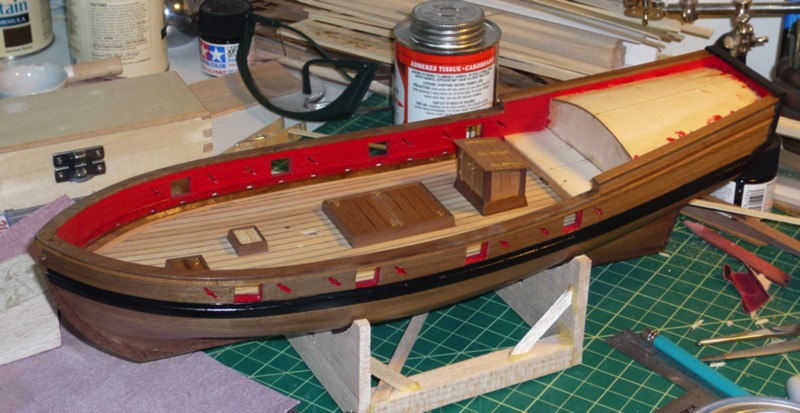
Just a quick update to show the completed decking. At long last all the of frame and structure of the ship is covered. The next step is to start building the cannons, but I've got lots going on over the next week or two, so there may not be a worthwhile update here for a few weeks :)
Armed Virginia Sloop - Decking
19 - July - 2009 - 19:40
Just a few images here of the in-progress deck planking. The main decking is done, and is soon to be followed by the mid deck planking. The black lines between planks here are meant to simulate the tar that was used on ships to waterproof the deck. In my model I just used a sharpie to color the edges of the planks before assembling them :) The various deck items from the previous post are shown below, although they are not actually glued into place yet.
Armed Virginia Sloop - Deck Objects
05 - July - 2009 - 20:45
A few days of cutting, sanding and gluing has brought forth an assortment of tiny little items:
There is a penny in the photo for size comparison, but needless to say, I had to learn to use two pairs of tweezers simultaneously in combination with a magnifying lamp. The grating on the smallest bit was assembled from some machine-cut comb-looking parts, so wasn't quite as tricky as it may look. I'm pretty happy with how the various brass bits turned out, although I found it quite difficult to satisfactorily file the ends of the brass wire that was used to simulate hinge pins. The files that I have are simply too coarse to smooth the ends of the wire, which get sort of smashed down by the wire cutters.
These are all of the deck buildings, though, so next step is main deck planking, and then cannons!
Armed Virginia Sloop - Planking Complete
03 - July - 2009 - 16:54
I've wrapped up the hull planking at long last. All in all, it was not too difficult overall, once I understood what the general goals were. It was a bit tedious, after a while, but I think the end result is very pleasing. Here are a few images of the unsanded and unfinished planking. In the second image, you can see where I goofed the planking pattern a bit.
Next I spent some time sanding the planking all smooth, starting with 150-grit sandpaper and then moving to 280 and then 320. Then, a coat of sanding sealer, some more sanding, and finally three coats of satin polyurethane.

Today, I spent time drilling and cutting and sanding the oar sweeps (diagonal holes in the sides). These were a little tricky, since the center hole is only 3/32" and I had to resort to the tiny bits (#62, I think) to drill through for the diagonal parts. Once the holes were drilled, I cut in between the holes with a tiny saw, and then made a thin sanding strip with some planking glued to sandpaper. I used that little sander to even out the interior of the holes. Then I painted the interior of each hole red, and then put polyurethane over everything that got painted or sanded, in order to have a nice uniform finish over everything. Finally, I decided to built a quick little working stand for the ship, since most of the work from this point on it on the deck. I just cut up some balsa that I had laying about and built a little stand, using the dremel to quickly get the stand to conform to the shape of the hull. There are some little felt circles in between the stand and hull, to avoid scrapes over time.
The kit comes with wood to build a stand, but since that wood is basswood, I was a little wary of building that stand now, since I think the basswood would get pretty beat up over time. I figure that this little balsa stand should do the trick for the time being and I don't have to worry too much about it getting broken. Anyhow, this is where the model stands at the moment:
Next I spent some time sanding the planking all smooth, starting with 150-grit sandpaper and then moving to 280 and then 320. Then, a coat of sanding sealer, some more sanding, and finally three coats of satin polyurethane.
Today, I spent time drilling and cutting and sanding the oar sweeps (diagonal holes in the sides). These were a little tricky, since the center hole is only 3/32" and I had to resort to the tiny bits (#62, I think) to drill through for the diagonal parts. Once the holes were drilled, I cut in between the holes with a tiny saw, and then made a thin sanding strip with some planking glued to sandpaper. I used that little sander to even out the interior of the holes. Then I painted the interior of each hole red, and then put polyurethane over everything that got painted or sanded, in order to have a nice uniform finish over everything. Finally, I decided to built a quick little working stand for the ship, since most of the work from this point on it on the deck. I just cut up some balsa that I had laying about and built a little stand, using the dremel to quickly get the stand to conform to the shape of the hull. There are some little felt circles in between the stand and hull, to avoid scrapes over time.
The kit comes with wood to build a stand, but since that wood is basswood, I was a little wary of building that stand now, since I think the basswood would get pretty beat up over time. I figure that this little balsa stand should do the trick for the time being and I don't have to worry too much about it getting broken. Anyhow, this is where the model stands at the moment: