
Hornethopter Completion
18 - November - 2012 - 09:08
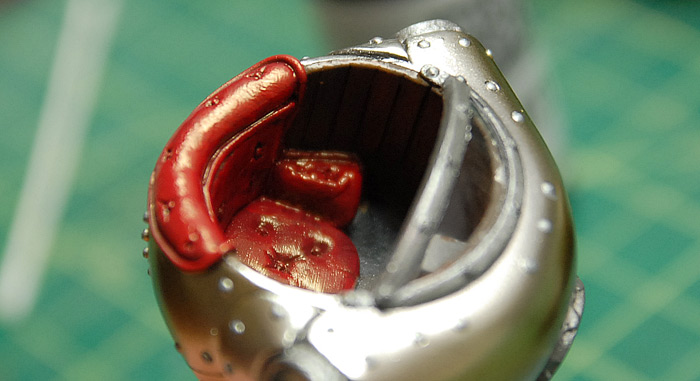
Painting continued on the Hornethopter. Once the exterior surfaces were generally complete, I moved on to the cockpit. I aimed to have a red velvet seat, wood panelling and misc metal and gray control surfaces. After I got most of it painted, I found that the red paint that I used had a bit more of a sheen than I had expected, and instead of a flat velvet-like red, it was more of a red leather. But, since I wasn't too married to the idea of red velvet and I actually like the way the red leather looked, I decided to just stick with that and leave it as-is.
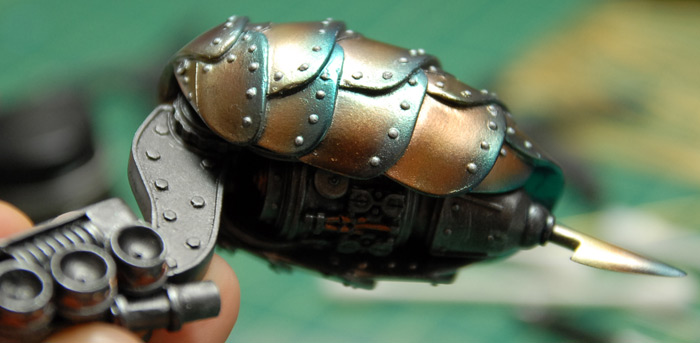
At this point I was ready to start general assembly. Below you can see the two major structure parts joined together.
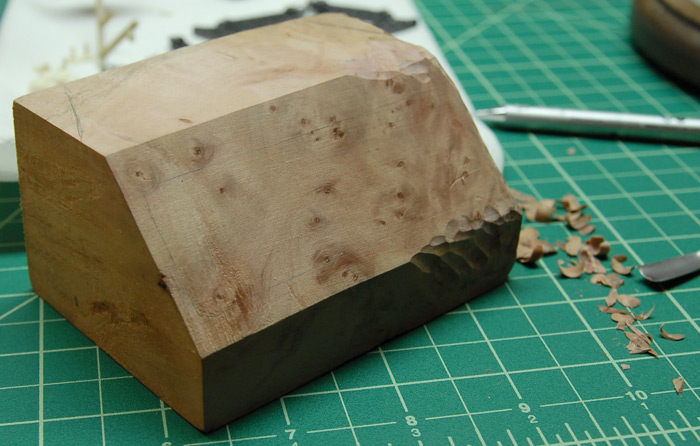
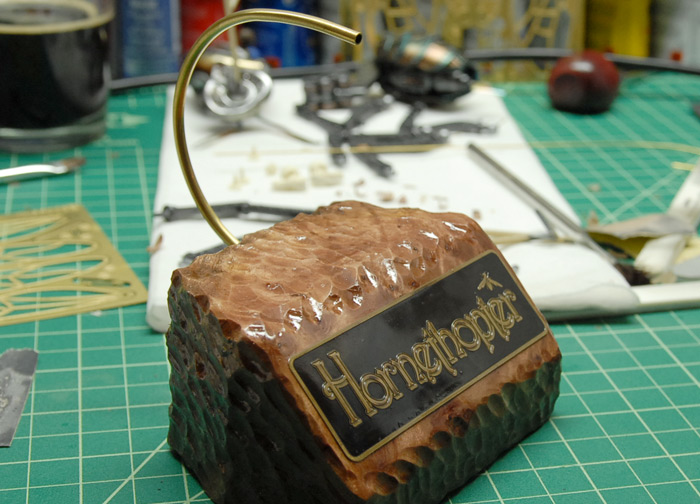
The catch was that I couldn't really do much more assembly until I could get the model up off of the ground, since the legs hang down and were likely to just get broken or scratched up if I attached them too early. With that in mind, I headed over to a local hardwood store and picked up a block of wood that was intended for turning on a latch. This meant that it came in large blocks, and was dipped in wax (presumably to keep it an even moisture level). I found a fairly small and inexpensive chunk that had a nice burl look to it and brought it home. It required cutting down a bit in order to get a proper sized piece as well as some quality time with a blow torch in order to melt off the bulk of the wax coating. So, with a hand saw/mitre box combo and lots of elbow grease, I ended up with the piece you see below.
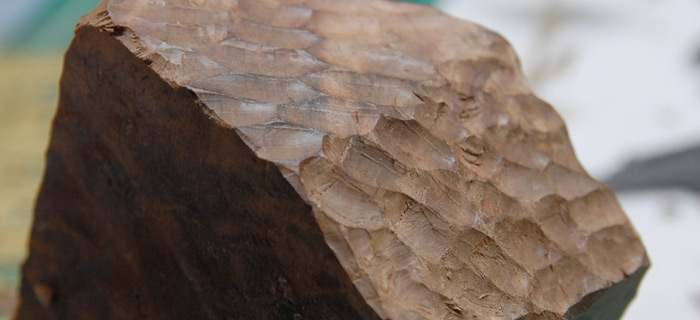
As you can see, the flat surfaces are a bit plain, and I wanted something that went with the steampunk theme a little better. I opted for a more organic hand-carved look for the block. This meant that I had to spend a bit of time going over the whole thing, breaking up the smooth surfaces and making it all look a bit more rustic.
After that, the block spent some quality time with gloss polyurethane and a brush, getting it all nice and shiny. I painted the name plate black and then gave it a light sanding to bring the raised text out. It then got a few coats of spray clear and was mounted to the flat front of the block. Finally, I ran some 1/8" brass tubing through a tube bender to get it curved nicely and attached that to the block as well.
Below you can see the frame of the Hornethopter mounted to the base.

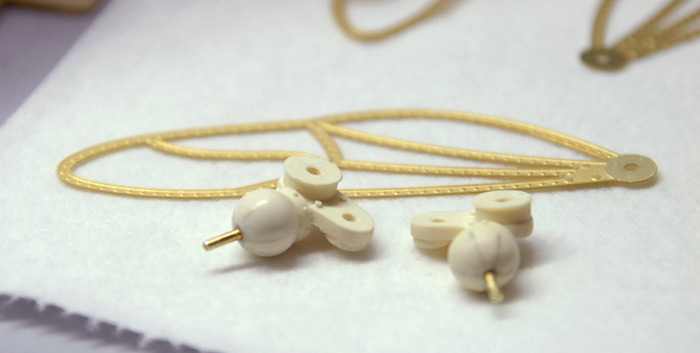
With that done, construction could precede, with the other parts being mounted and the wings finally being started on. I realized that it probably would have been a bit better to figure out the wing mounting techniques a bit earlier, before painting, since it was going to be tricky to not damage the paint now. I settled on a little trick that worked pretty well: I drilled holes into the wing sockets on the body of the model, and the set brass rod in there that was the exact depth of the hole. I put a tiny dab of super glue on the end of the rod and then pressed the wing base into the socket at the angle that I wanted it to stay at. This caused the bit of rod to stick to the wing in the exact spot and at the exact angle that I needed. I then gently removed both and drew a bunch of reference lines in pencil on the wing base. Then I could remove the brass rod and drill a hole at just the right angle to make it all fit back together perfectly (except stronger).
Below you can see the wing bases with their brass rods glued it, and with the reference marks still in place.
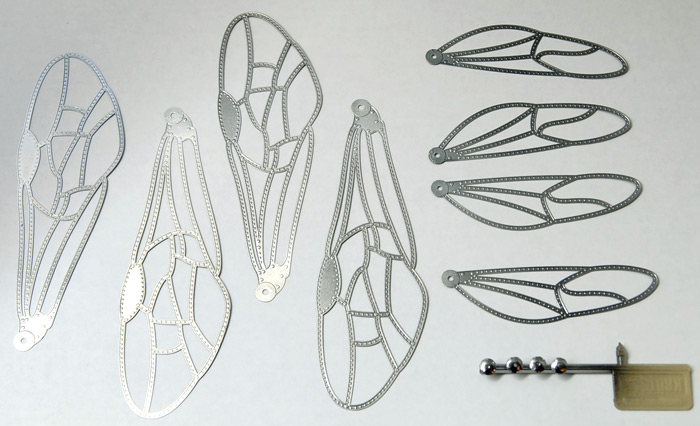
The wing frames after their coats of black gloss paint and a few coats of the same chrome paint that the rest of the body got.
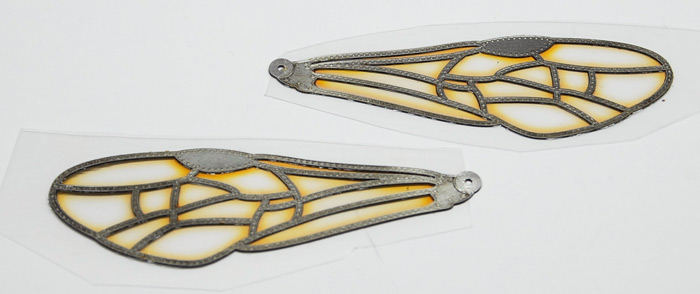
Using the wing template available from the manufacturer's web site, I designed some wing film inserts that had the same general color scheme as the rest of the model. These were printed out on ink-jet-friendly transparency film and glued in between the layers of photo-etch wing. Here you can see them before the excess was trimmed off.
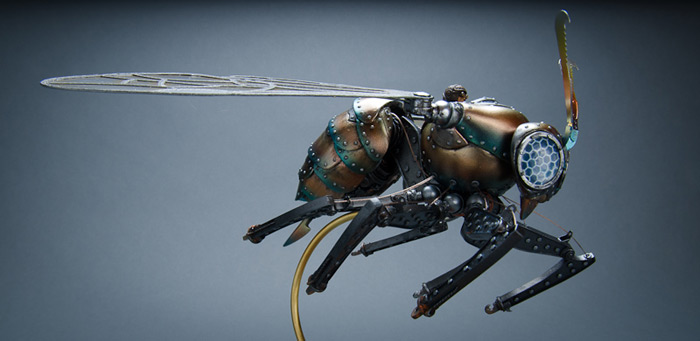
Finally, the wings were attached, any paint chips were touched up, and a little bit of grease/oil/rust was added here and there.
Click HERE or on the image below to see the galley of the completed model.
At this point I was ready to start general assembly. Below you can see the two major structure parts joined together.
The catch was that I couldn't really do much more assembly until I could get the model up off of the ground, since the legs hang down and were likely to just get broken or scratched up if I attached them too early. With that in mind, I headed over to a local hardwood store and picked up a block of wood that was intended for turning on a latch. This meant that it came in large blocks, and was dipped in wax (presumably to keep it an even moisture level). I found a fairly small and inexpensive chunk that had a nice burl look to it and brought it home. It required cutting down a bit in order to get a proper sized piece as well as some quality time with a blow torch in order to melt off the bulk of the wax coating. So, with a hand saw/mitre box combo and lots of elbow grease, I ended up with the piece you see below.
As you can see, the flat surfaces are a bit plain, and I wanted something that went with the steampunk theme a little better. I opted for a more organic hand-carved look for the block. This meant that I had to spend a bit of time going over the whole thing, breaking up the smooth surfaces and making it all look a bit more rustic.
After that, the block spent some quality time with gloss polyurethane and a brush, getting it all nice and shiny. I painted the name plate black and then gave it a light sanding to bring the raised text out. It then got a few coats of spray clear and was mounted to the flat front of the block. Finally, I ran some 1/8" brass tubing through a tube bender to get it curved nicely and attached that to the block as well.
Below you can see the frame of the Hornethopter mounted to the base.
With that done, construction could precede, with the other parts being mounted and the wings finally being started on. I realized that it probably would have been a bit better to figure out the wing mounting techniques a bit earlier, before painting, since it was going to be tricky to not damage the paint now. I settled on a little trick that worked pretty well: I drilled holes into the wing sockets on the body of the model, and the set brass rod in there that was the exact depth of the hole. I put a tiny dab of super glue on the end of the rod and then pressed the wing base into the socket at the angle that I wanted it to stay at. This caused the bit of rod to stick to the wing in the exact spot and at the exact angle that I needed. I then gently removed both and drew a bunch of reference lines in pencil on the wing base. Then I could remove the brass rod and drill a hole at just the right angle to make it all fit back together perfectly (except stronger).
Below you can see the wing bases with their brass rods glued it, and with the reference marks still in place.
The wing frames after their coats of black gloss paint and a few coats of the same chrome paint that the rest of the body got.
Using the wing template available from the manufacturer's web site, I designed some wing film inserts that had the same general color scheme as the rest of the model. These were printed out on ink-jet-friendly transparency film and glued in between the layers of photo-etch wing. Here you can see them before the excess was trimmed off.
Finally, the wings were attached, any paint chips were touched up, and a little bit of grease/oil/rust was added here and there.
Click HERE or on the image below to see the galley of the completed model.
blog comments powered by Disqus