
Hornethopter Painting
25 - September - 2012 - 20:42
Hi there! Just a quick post today to show a bit of progress on the painting of the Hornethopter. In the last post, I showed my inspiration sheet, with the heat-treated titanium images on it. Also shown were the various parts that had been sprayed with the chrome paint. This post aims to show a few of the steps in going from chrome to heat-treated.
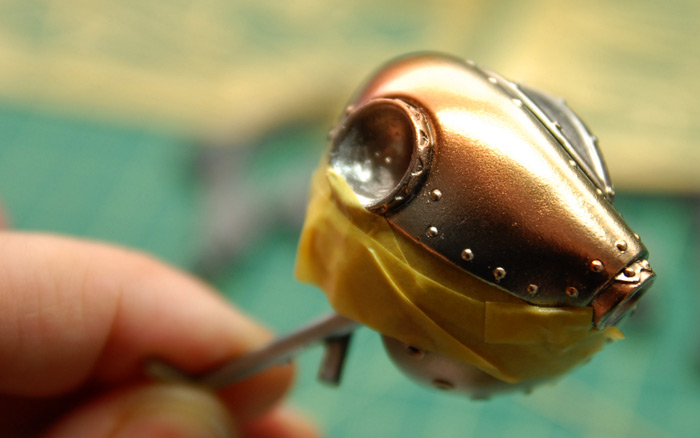
I switched the airbrush to the super-fine tip and needle and loaded it up with just a tiny bit of diluted Tamiya clear yellow. With the pressure set to about 15-20lbs, I freehanded some soft bands of yellow across the abdomen sections. Once I had bands of yellow on all the parts, I followed up with similarly-diluted clear red. Soft bands of clear red gave me something like so:

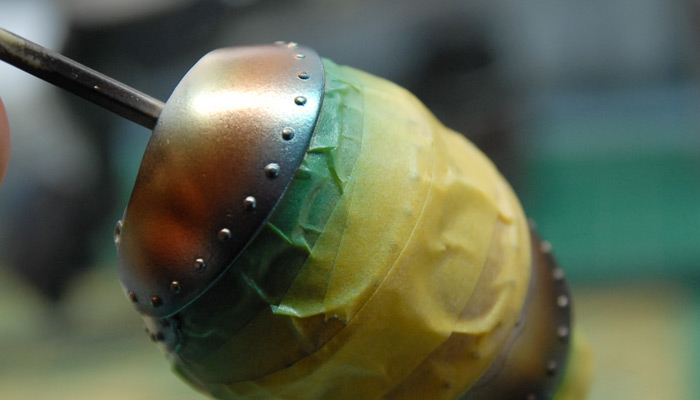
Below you can see the yellow and red in place and the part masked before applying the clear blue.
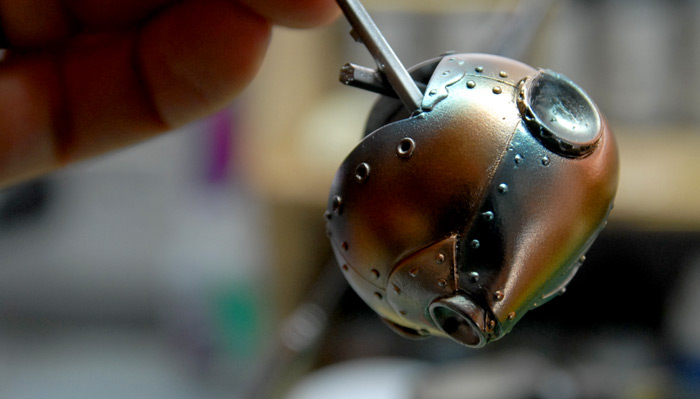
And the abdomen masked and painted with the first pass of blue:
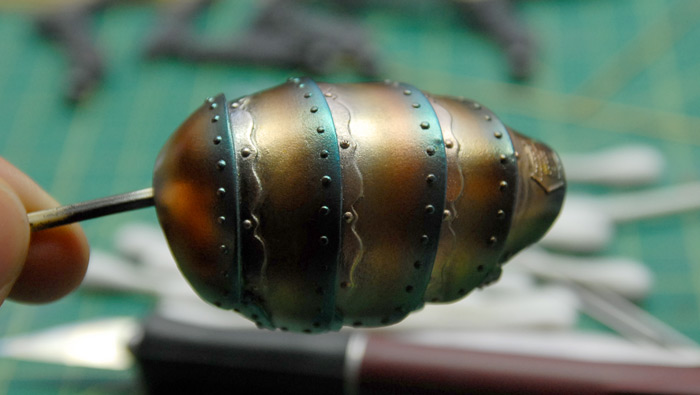
Thorax fully sprayed with all three colors:
The abdomen was tricky, because it had to be painted in three steps. This was required in order to give each section plenty of space to blend the blue in, but still get a clean line against the section below. Below you can see the abdomen with all three colors applied.
Next up is putting a contrasting dark steel color on the filigree-like metal strips between the sections as well as the casting plate right at the tail. That will be following by the beginning of hand painting the cockpit and picking out all the rivets with a contrasting paint. Thanks for reading!
I switched the airbrush to the super-fine tip and needle and loaded it up with just a tiny bit of diluted Tamiya clear yellow. With the pressure set to about 15-20lbs, I freehanded some soft bands of yellow across the abdomen sections. Once I had bands of yellow on all the parts, I followed up with similarly-diluted clear red. Soft bands of clear red gave me something like so:
Below you can see the yellow and red in place and the part masked before applying the clear blue.
And the abdomen masked and painted with the first pass of blue:
Thorax fully sprayed with all three colors:
The abdomen was tricky, because it had to be painted in three steps. This was required in order to give each section plenty of space to blend the blue in, but still get a clean line against the section below. Below you can see the abdomen with all three colors applied.
Next up is putting a contrasting dark steel color on the filigree-like metal strips between the sections as well as the casting plate right at the tail. That will be following by the beginning of hand painting the cockpit and picking out all the rivets with a contrasting paint. Thanks for reading!
blog comments powered by Disqus