
F-84e Thunderjet Completion
10 - June - 2013 - 20:42
Picking up where the last post left off, the decal work continued. It was pretty straight-forward, with liberal use of MicroSet and MicroSol to try to get the decals to sink into the panel lines and rivets. This was generally successful, but if you look closely in the finished model galley, you can see a few areas where the decals were a bit stubborn. This was mostly on the large wing insignias and the stars and bars on the sides of the fuselage. I'm just guessing that the white layer was a little tougher than the others, making those decals a bit harder to soften.
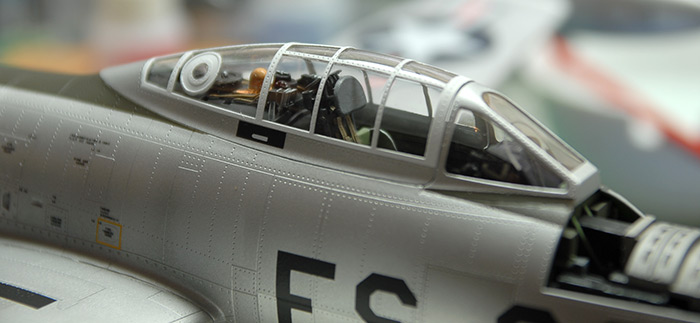
With all the decals on, I sprayed the whole jet with a few coats of Testors Flat Clear to kill the gloss and give everything the same sheen. Below you can see the canopy with the masking removed and everything with a nice dull finish.
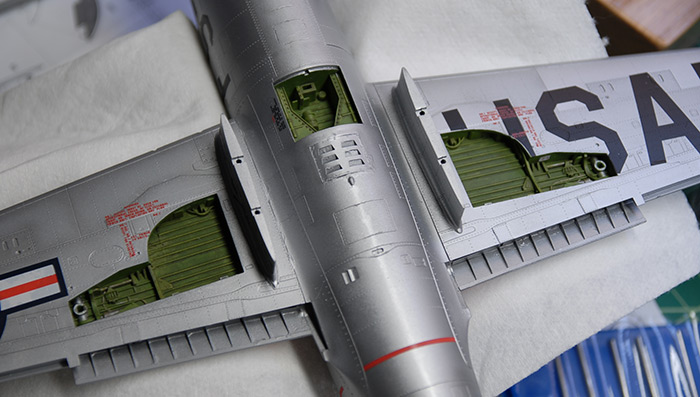
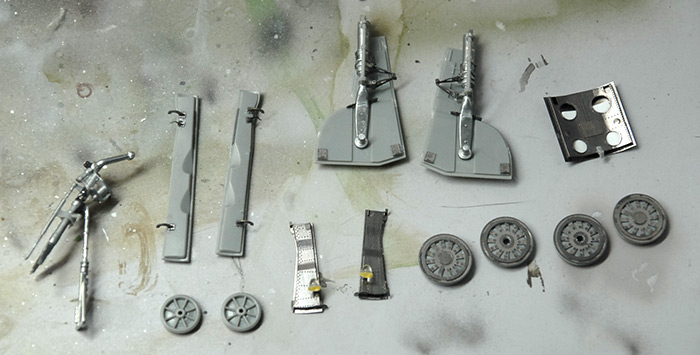
The last step in construction was to assemble all the fiddly bits that are prone to breakage, and thus left to the end. This was also an area that had the most replacement with either kit metal parts or Eduard photo etch detail parts. The landing gear all had metal parts that came with the kit as well as a few small details that were from the Eduard kit. The air brake and small gear doors (upper left and lower center, respectively) were full replacements with Eduard parts, although with the air brake, I completely misplaced some vent louvres, so I had to make a few replacements with very thin plastic card (the white you can see through the holes in the image below). Below you can see them all built and ready for priming and painting.
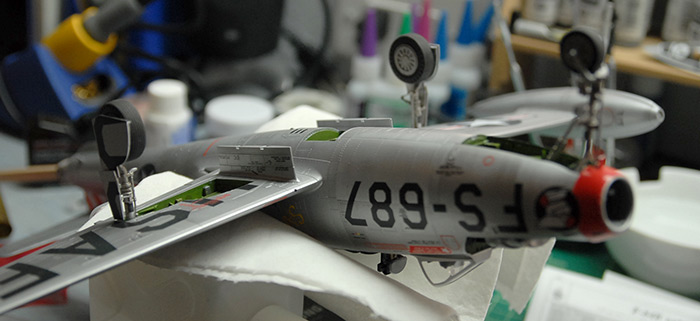
Those parts all got the same paint treatment as the body, and were then decalled, sprayed with flat, and then assembled. Below, you can see the jet propped at a funny angle as the epoxy on the landing gear sets.
This is where I got a bit lazy with the documentation photography. But after this point, all that was left was some weathering, and the assembly and painting of the two bombs that attach to the pylons. Weathering was done using a neutral wash from MIG. I tested out using black watercolors first, but it just didn't like the flat clear coat, and just wanted to bead up and make black water spots. I settled on a fairly easy technique where I'd paint on the neutral wash with a small paint brush, covering all the panel lines and rivet lines. Then, I'd let it dry for at least a few hours (so that it was completely dry), and then go back over it with a lint-free wipe, dampened with thinner (the sort that is meant to work with MIG pigments). That wiped most of the wash away, but left just enough behind in the lines and rivets to be pleasing. It also left just a bit on the surface to make things look not quite so clean.
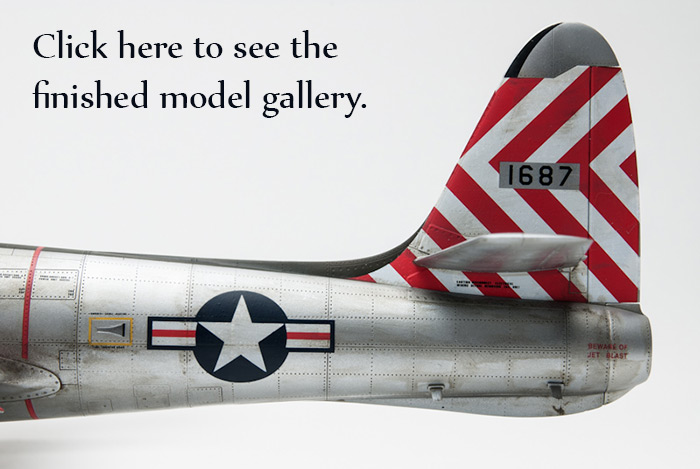
Well, that one is all wrapped up, so check out the images of the finished model by clicking on the image below. Thanks for reading!
With all the decals on, I sprayed the whole jet with a few coats of Testors Flat Clear to kill the gloss and give everything the same sheen. Below you can see the canopy with the masking removed and everything with a nice dull finish.
The last step in construction was to assemble all the fiddly bits that are prone to breakage, and thus left to the end. This was also an area that had the most replacement with either kit metal parts or Eduard photo etch detail parts. The landing gear all had metal parts that came with the kit as well as a few small details that were from the Eduard kit. The air brake and small gear doors (upper left and lower center, respectively) were full replacements with Eduard parts, although with the air brake, I completely misplaced some vent louvres, so I had to make a few replacements with very thin plastic card (the white you can see through the holes in the image below). Below you can see them all built and ready for priming and painting.
Those parts all got the same paint treatment as the body, and were then decalled, sprayed with flat, and then assembled. Below, you can see the jet propped at a funny angle as the epoxy on the landing gear sets.
This is where I got a bit lazy with the documentation photography. But after this point, all that was left was some weathering, and the assembly and painting of the two bombs that attach to the pylons. Weathering was done using a neutral wash from MIG. I tested out using black watercolors first, but it just didn't like the flat clear coat, and just wanted to bead up and make black water spots. I settled on a fairly easy technique where I'd paint on the neutral wash with a small paint brush, covering all the panel lines and rivet lines. Then, I'd let it dry for at least a few hours (so that it was completely dry), and then go back over it with a lint-free wipe, dampened with thinner (the sort that is meant to work with MIG pigments). That wiped most of the wash away, but left just enough behind in the lines and rivets to be pleasing. It also left just a bit on the surface to make things look not quite so clean.
Well, that one is all wrapped up, so check out the images of the finished model by clicking on the image below. Thanks for reading!
blog comments powered by Disqus